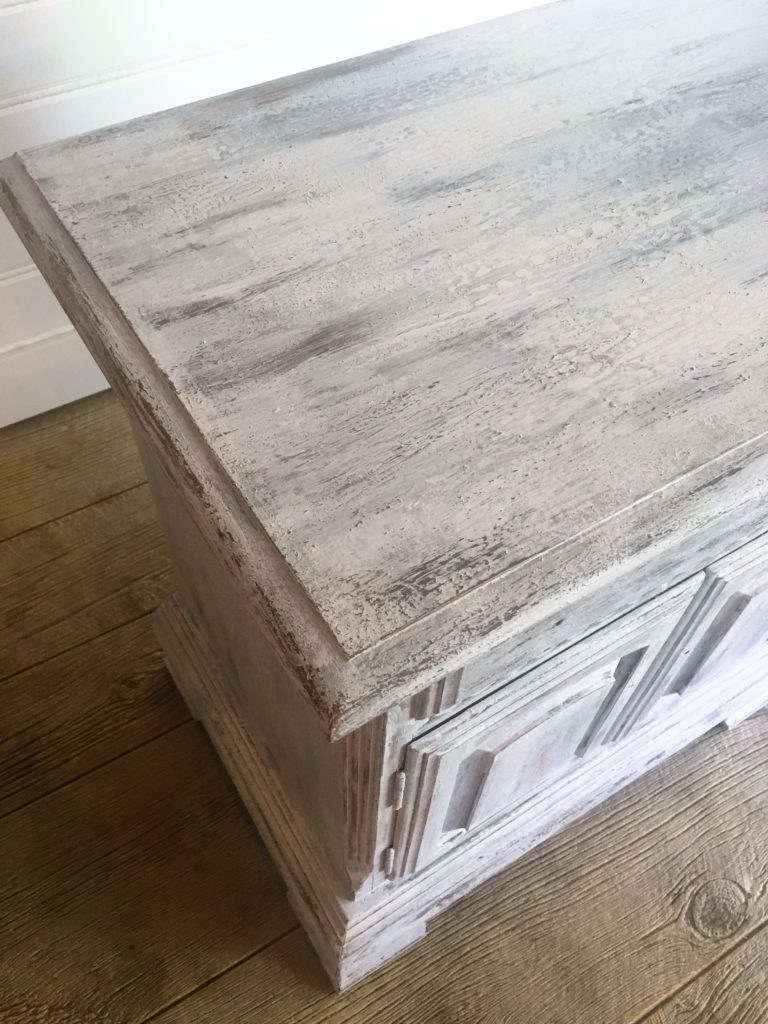
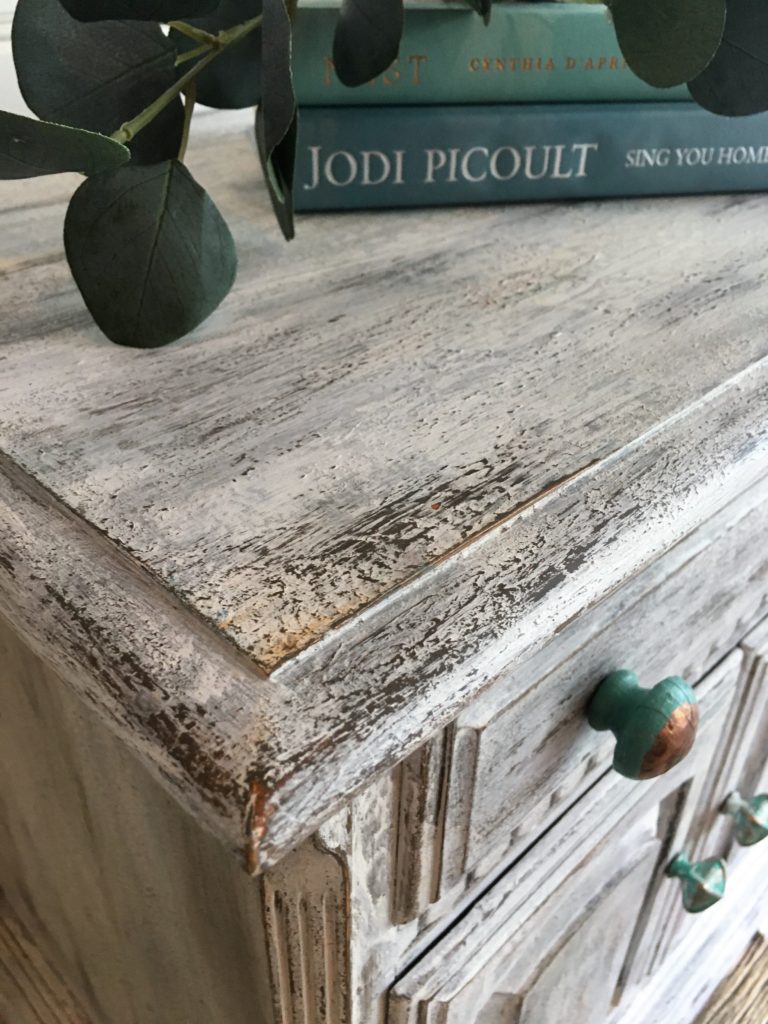
Sometimes a smooth, polished finish can be so perfect; simple, sleek, and timeless. There’s also times when you just need the spontaneity, texture, and outside-the-lines finish. That is exactly what I wanted that for this end table and I decided on a layered, crackle finish!
Achieving a crackle finish can be unpredictable, but that is also what can be so exciting about it. You’re not entirely sure what you’re going to get, and often you’ll be surprised by the results!
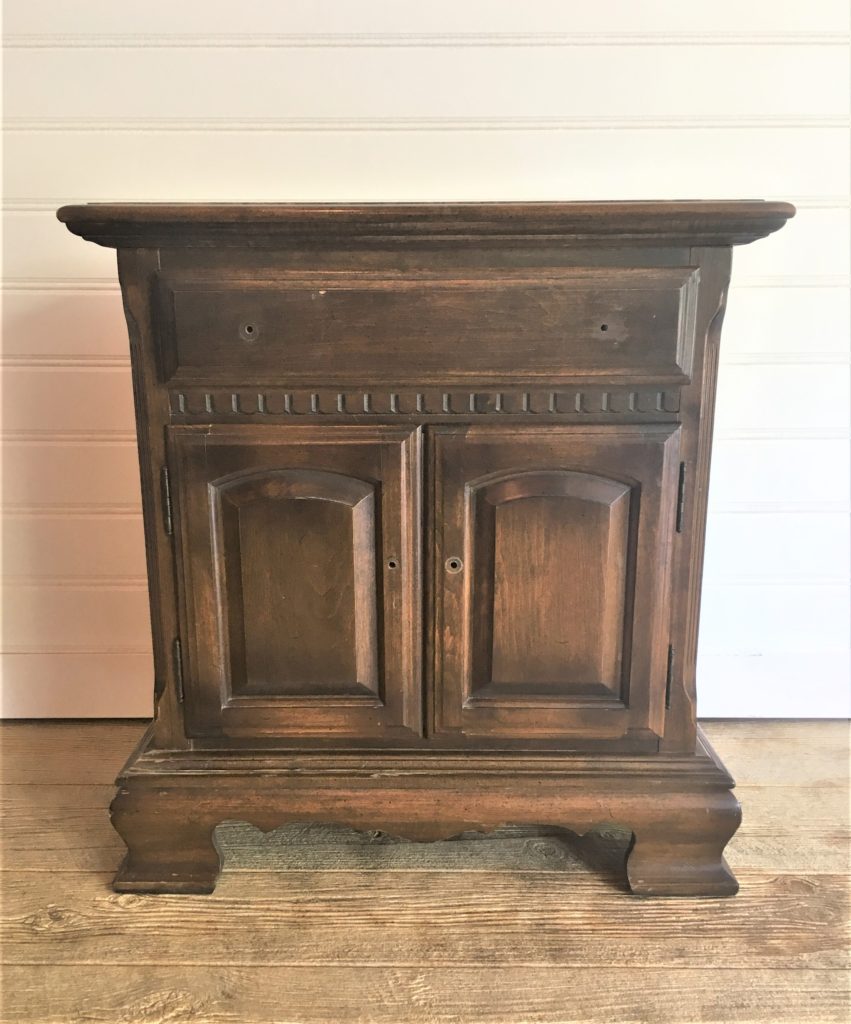
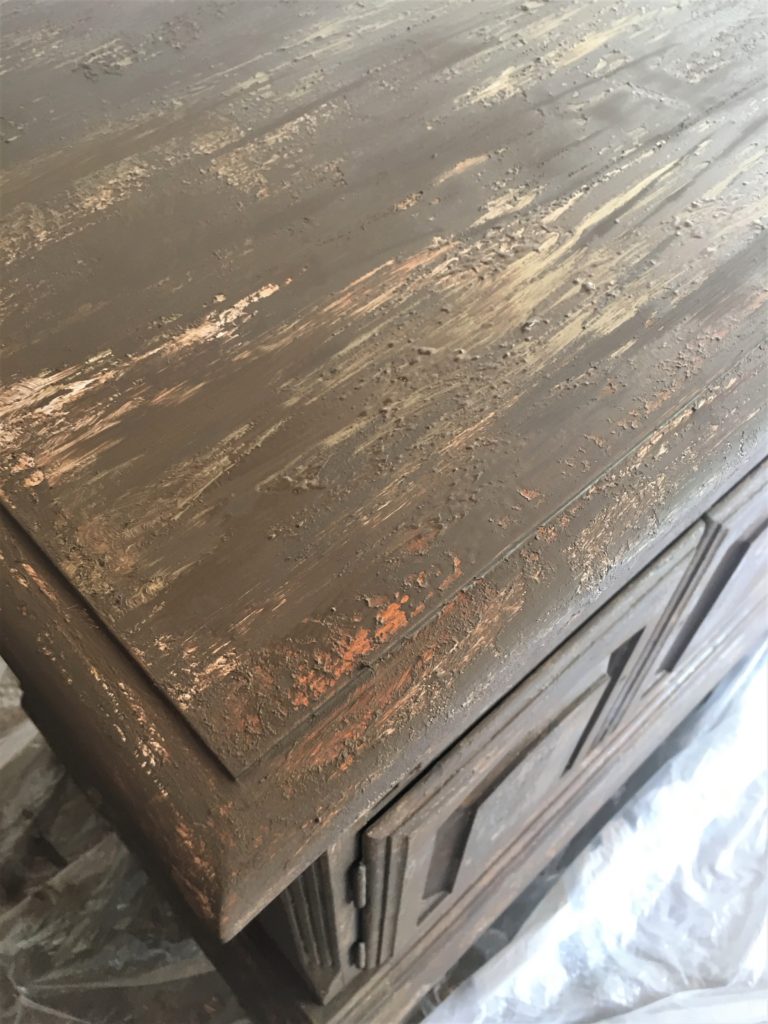
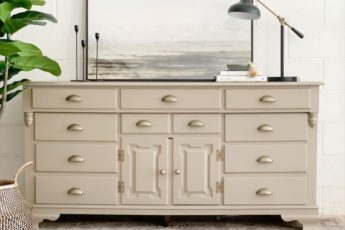
Before Crackle
CLEAN AND PREP PROCESS, AND PRODUCTS:
- Vacuumed base, sides, and inside drawers (my amazing mom gave me this piece and that means it came with a little husky love too!)
- Cleaned entire piece with Amy Howard Clean Slate using a rag
- Sanded down top with my orbital sander and 120 grit paper to even out a few areas
- Removed sawdust
- Removed hardware
PRE-CRACKLE PAINT PROCESS:
When it comes to crackle you have a few options depending on the colors you want your piece to be. You first need to determine what color(s) you want your base to be. This will be the color(s) that will show through your cracks.
- If you like the color of wood or existing paint on your piece you can skip to the crackle process
- If you are looking to bring in different colors, you will paint your piece first
- You can paint the whole thing OR
- Paint certain areas where you want the colors to come through
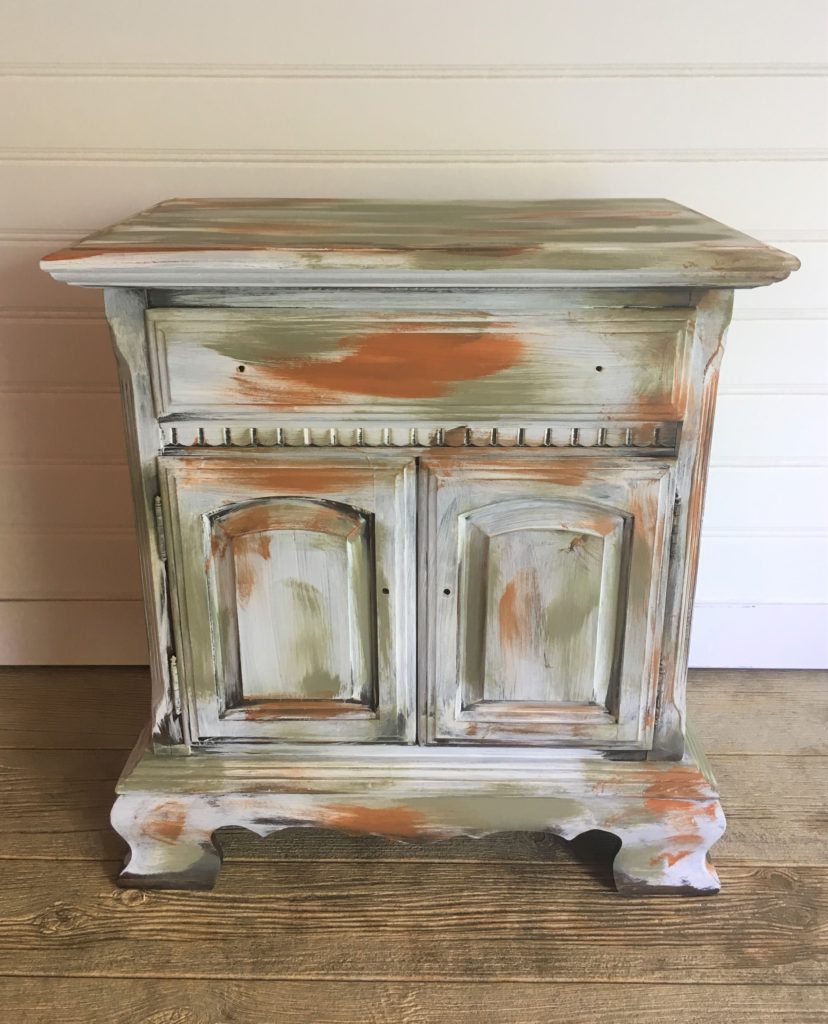
I wanted to bring out multiple colors, so I first painted most of the piece with Annie Sloan Pure White Chalk Paint, then added Barcelona Orange and Château Grey in random areas.
CRACKLE FINISH PROCESS AND PRODUCTS:
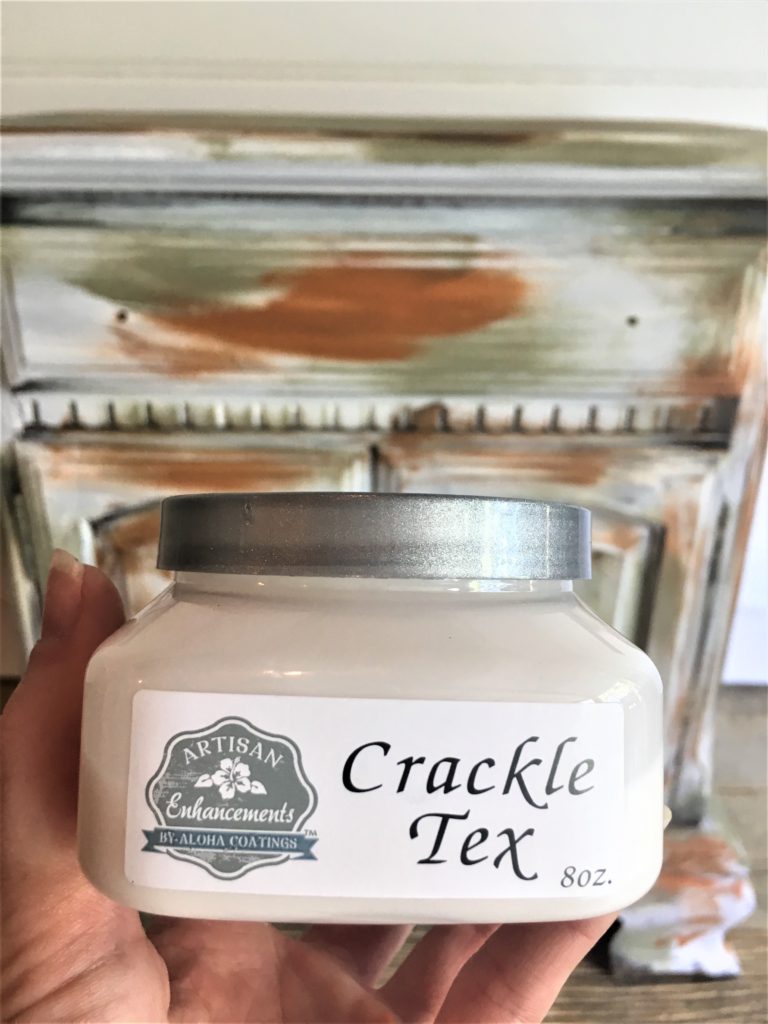
- Painted on Artisan Enhancement Crackle Tex made to create larger crackle
- Paint liberally with a foam brush on areas you want to crackle
- Don’t overwork the crackle by overbrushing
- Can be applied thickly just make sure to watch for drips
- It goes on milky but dries clear
- Let dry completely – I waited overnight
3. Paint your top color – This layer of paint will activate the crackle.
HELPFUL TIPS:
- #1: You will need to paint rather quickly as to not overwork the crackle – as the paint starts to dry you will see cracks and you don't want to paint over these
- #2: Make sure to apply enough paint to allow crackling to take place
- #3: Use your brush to apply a little pressure by stippling to remove more paint if your crackle isn’t as prominent as you’d like (I did this to reveal more of my base color)
- #4: if you want a linear crackle effect, apply paint in linear strokes (I used this technique)
I mixed a rusty brown I thought would be my top color. My heart must have been yearning for Fall based on my color choices. However, once my top color was dry my brown was wayyy less orange than I wanted. Sometimes mistakes can yield a better outcome, especially when you use products that allow you to layer them.
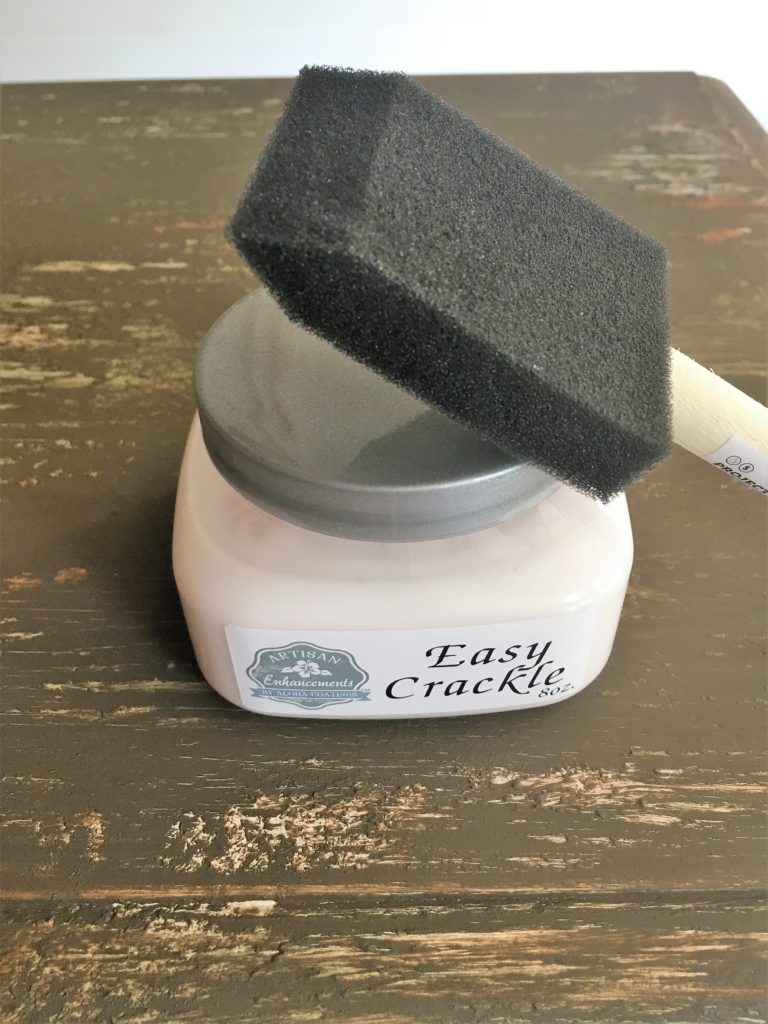
CRACKLE ROUND 2:
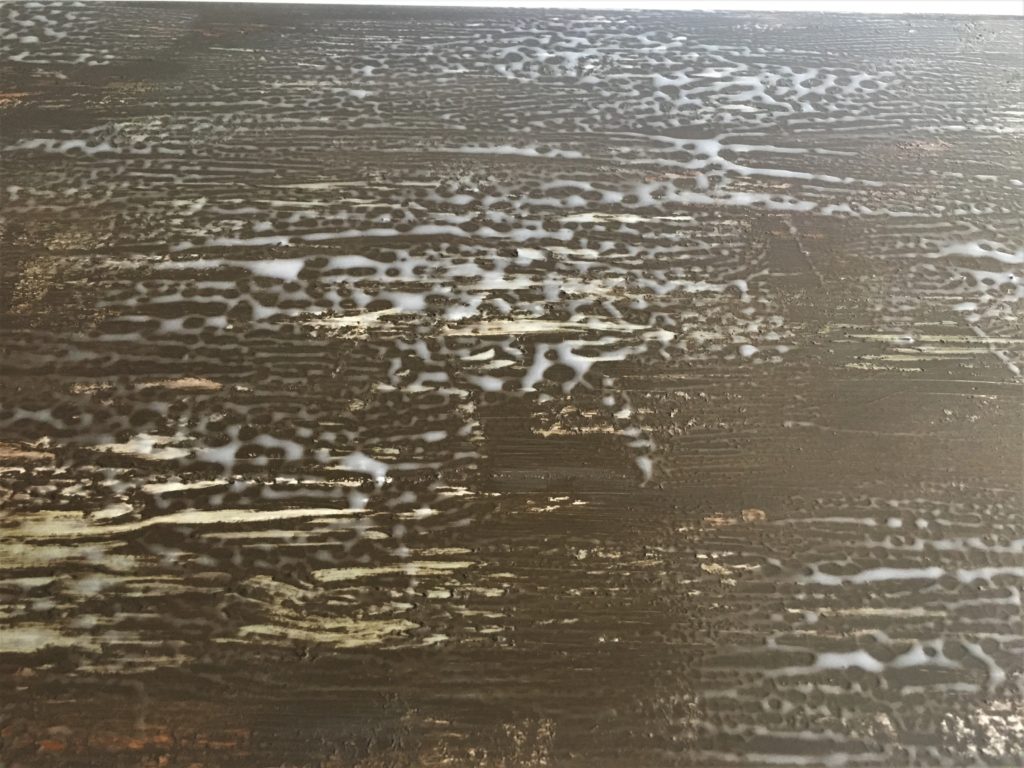
I decided to do a second layer of crackle but this time using ArtIsan Enhancements Easy Crackle – used for finer crackling. I followed my same process above; applying the crackle over my piece. Below is what the crackle medium looks like as it begins to dry. You can see how it dissipates, creating the crackle that will be activated once the top coat paint is applied over it.
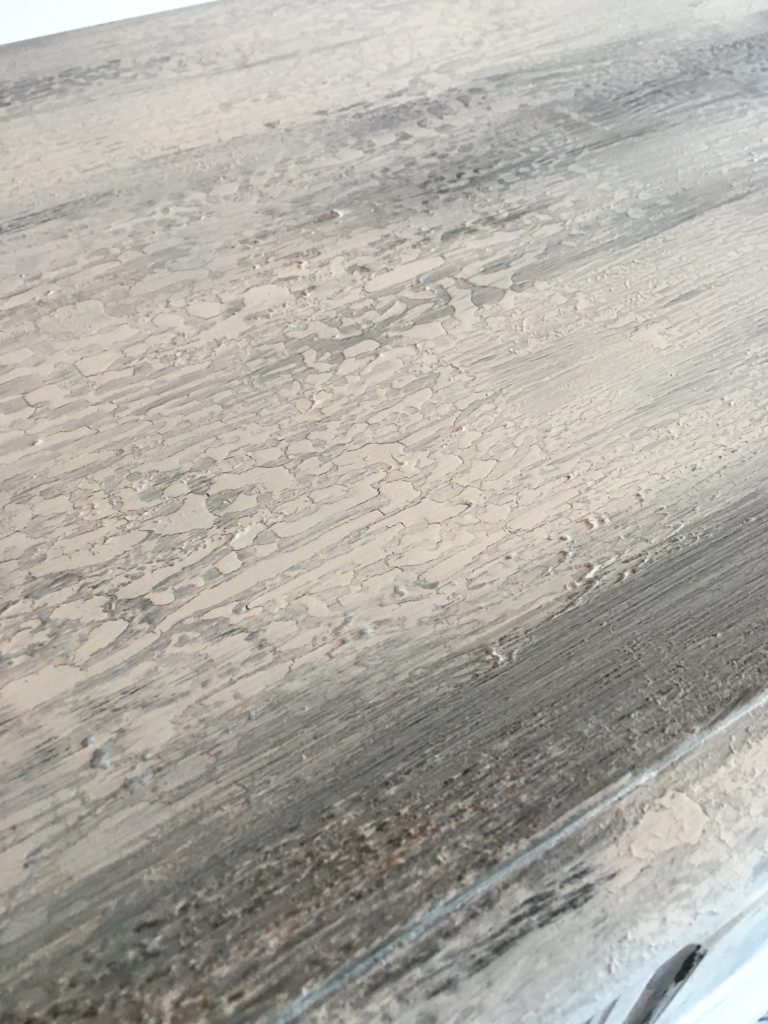
I let the crackle dry completely before I painted my new top color – Annie Sloan Pure White Chalk Paint. I stippled random areas with my brush to create additional texture. Then, I distressed the piece with 150 grit sandpaper to create more dimension. I was already SO much happier with this new look compared to my boring brown.
FINISH PROCESS AND PRODUCTS:
- Removed dust from distressing
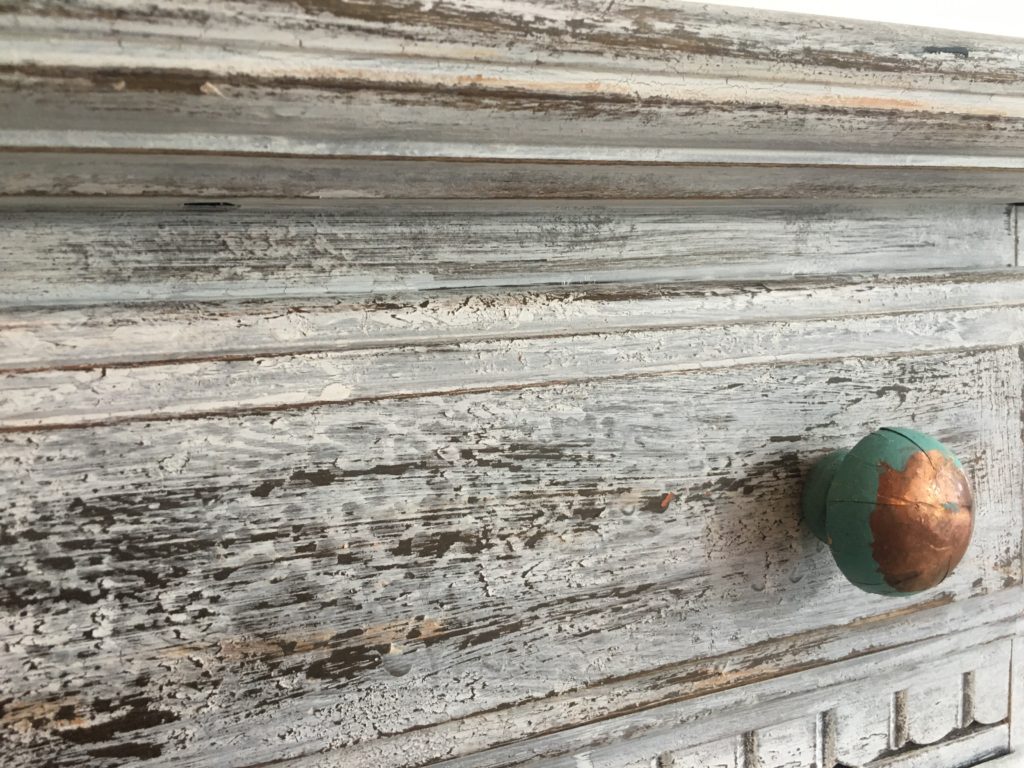
- Added Annie Sloan Barcelona Orange and Provence Chalk Paint to edges and small areas to complement the new hardware
- Applied Annie Sloan Clear Wax
- Let absorb into piece overnight
- Buffed to a beautiful sheen with a lint-free rag
- Applied Black wax lightly to small areas to create additional depth and contrast where needed
- Buffed right away after application
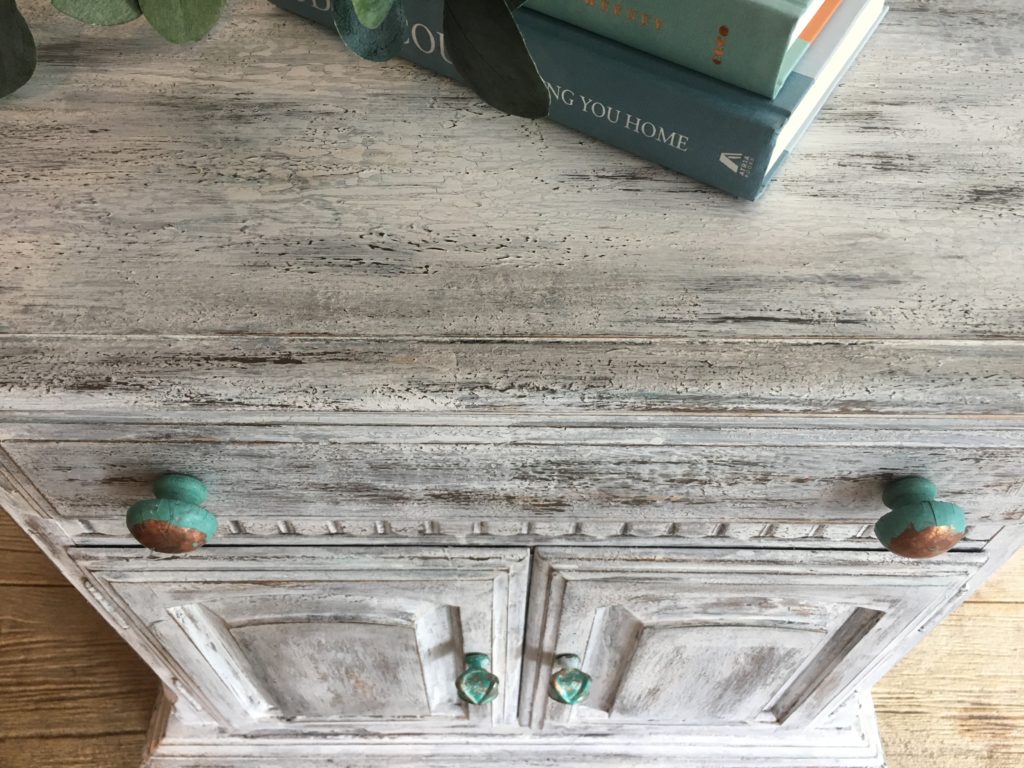
- Added new hardware from Hobby Lobby: top knobs & lower knobs
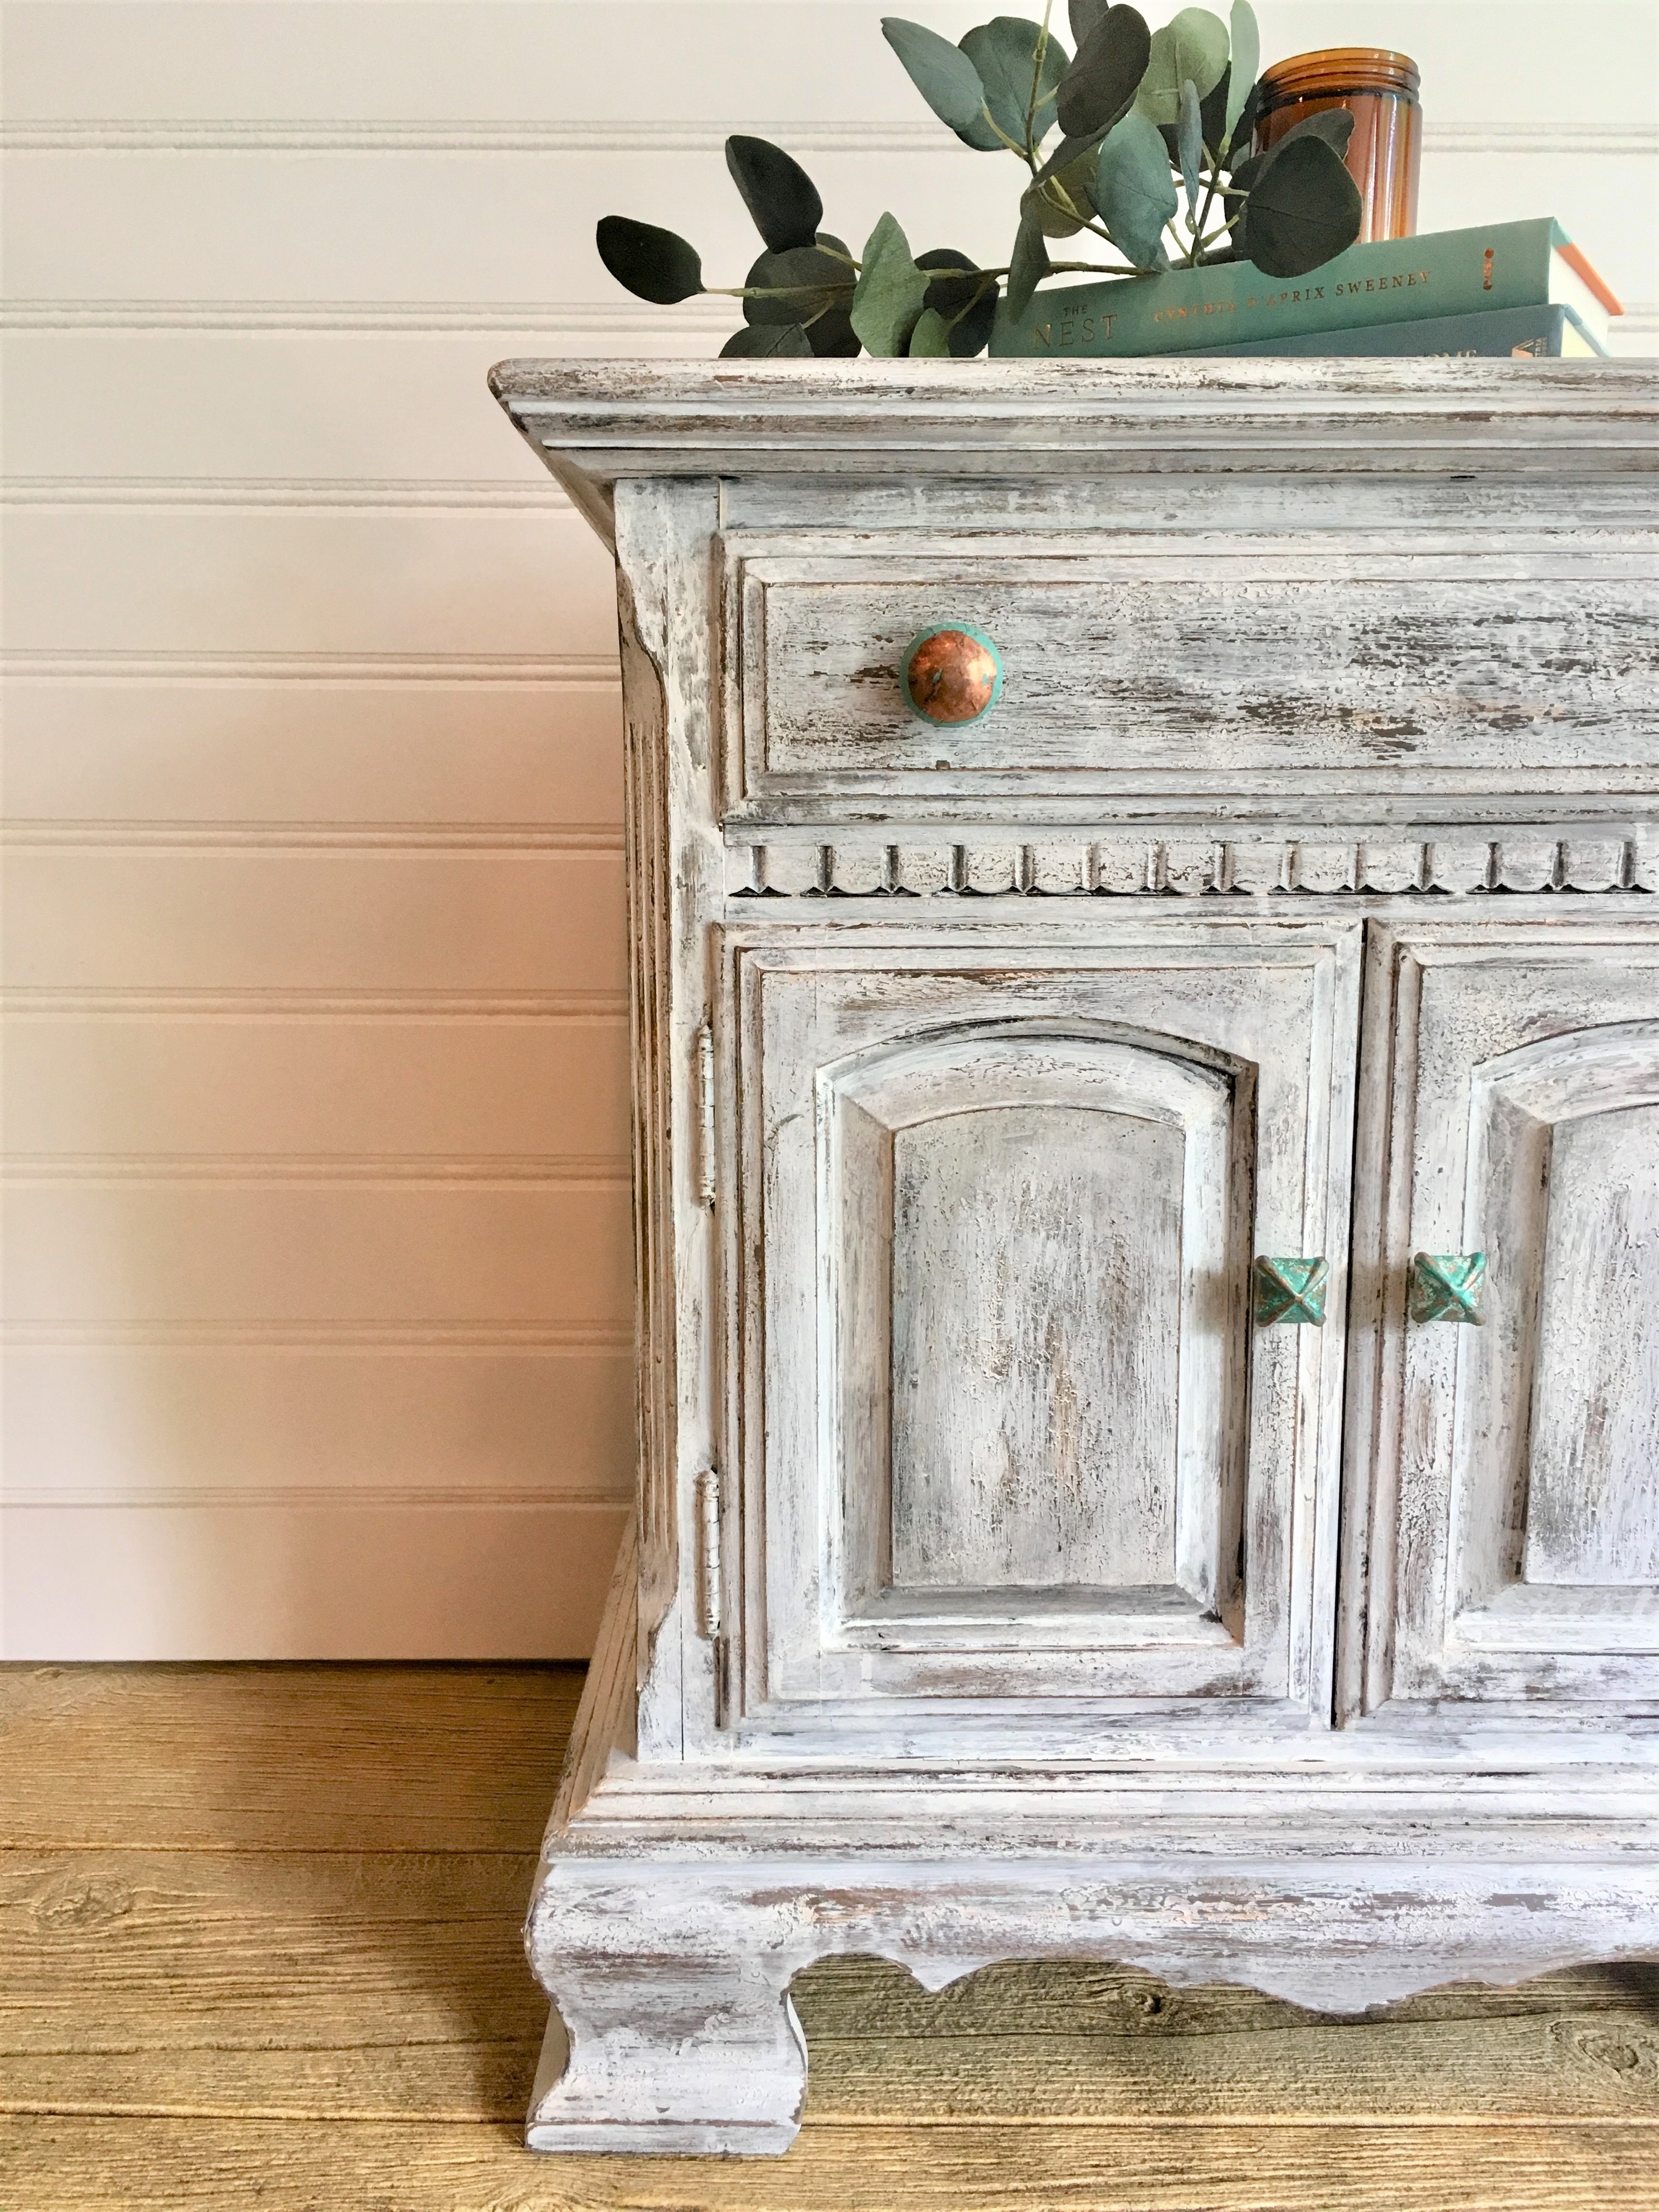
THE REVEAL:
Voila! I love the texture I was able to achieve with this crackle finish! It’s a fun shabby chic look with layers of love.
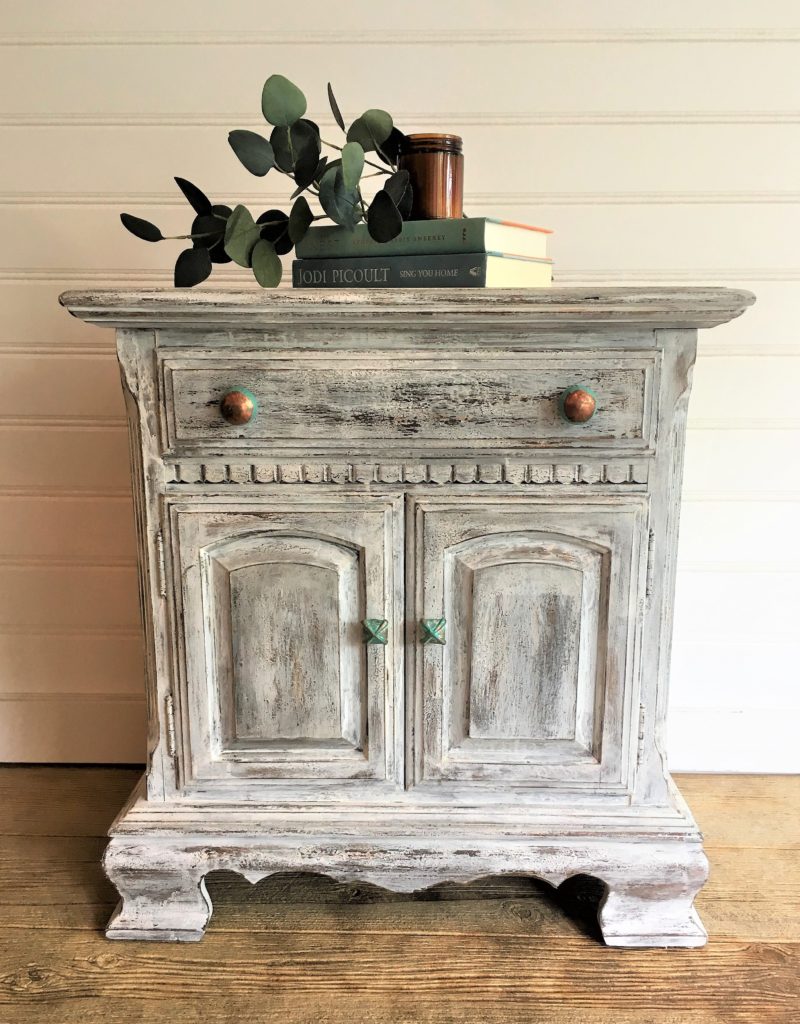
If you’re looking to achieve a crackle finish like this, the Artisan Enhancement products are really easy to use and work perfectly with water-based paints like Annie Sloan chalk paint. I got mine at Time for Decor, in Green Bay. You can get them from a retailer near you by searching here.
It’s important to read each product's instructions and note each piece will crackle differently. Even mine took a little manual intervention to get a more “chippy” look. That is also half of the fun; you never know exactly what you are going to get, but it is totally worth it!
If you have used crackle and have any tips or tricks, OR if have any questions on the crackle process, drop a comment or question below!
Want to try a two-color distressed look instead? Try these steps!
This post contains affiliate links, which means if you make a purchase through one of the product links, I will receive a small commission. Don’t worry, you won’t be charged anything extra. This just helps keep the site running & goes right back into my business!


LisaAugust 15, 2018 3:32 am
Megan so glad you are enjoying your products we sent home with you. Thanks for giving Time For Decor a shout out.
Megan DeLongAugust 15, 2018 11:31 am
Thanks Lisa!! I am excited to play with the other ones you sent me with too! Now I just need more furniture pieces 😉