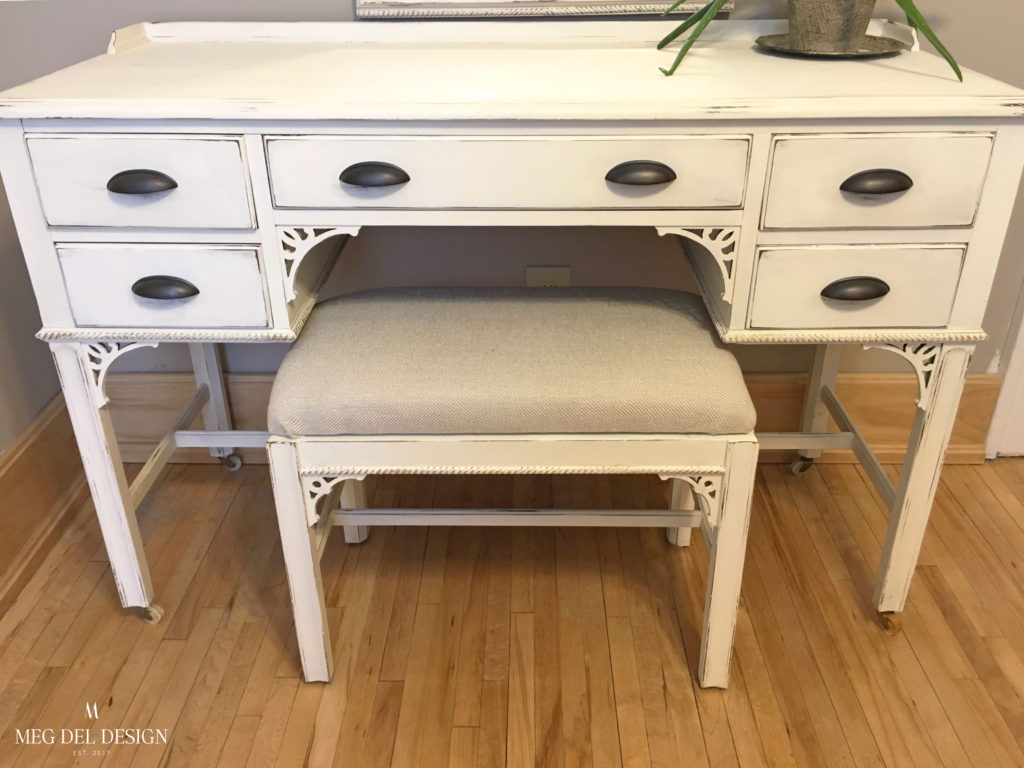
Moms Deserve the World.. Or at Least a Beautiful Vanity.
I had the best few days with my mom last week! It was her first time visiting since we moved to Morgantown, West Virginia in July, and it was so great. She is one of my biggest supporters and truly my best friend.

Coopers Rock, Morgantown, WV
In addition to being the best mom, she is also quite the master rummager/curbside finder. Just ask my dad. He’s basically the reinforcements when she can’t get something into her car, or if he is driving it’s not uncommon to hear, “Ooo, Charlie pullover!” I don’t know if it is pure luck or skill, but either way, we love her for it!
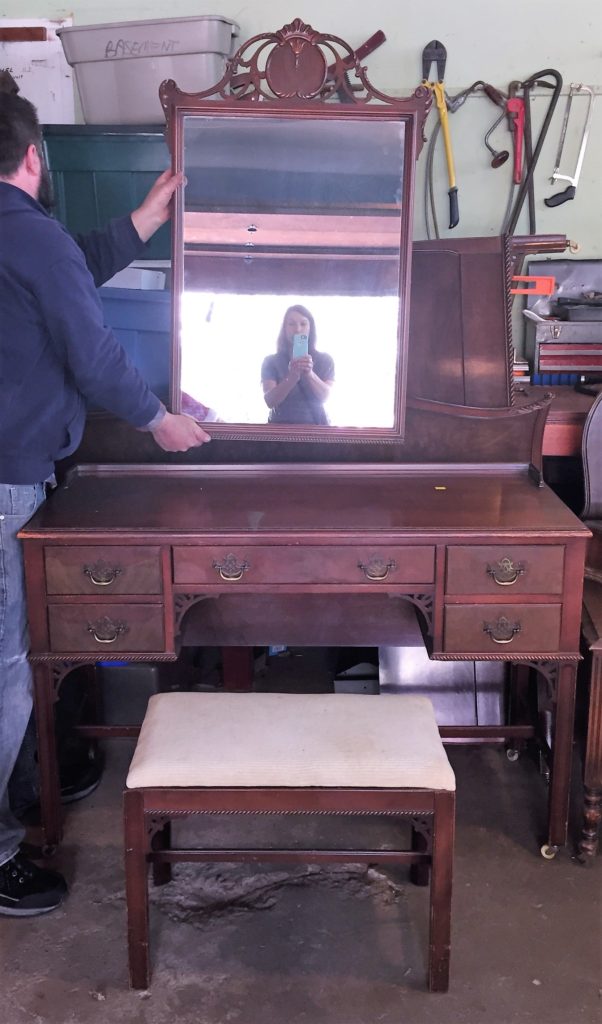
$40 Vanity Before Chalk Paint
She found this vanity for $40 at a rummage – vanity, mirror, bench and all! My mom is so generous and was thinking of how this piece would benefit me as I started flipping. She never asked if I would redo this for her, even though I knew she could use something like this.
As soon as paint hit this piece, I knew I wouldn’t be able to sell it. It was going to be great, and I wanted it to be perfect for her.
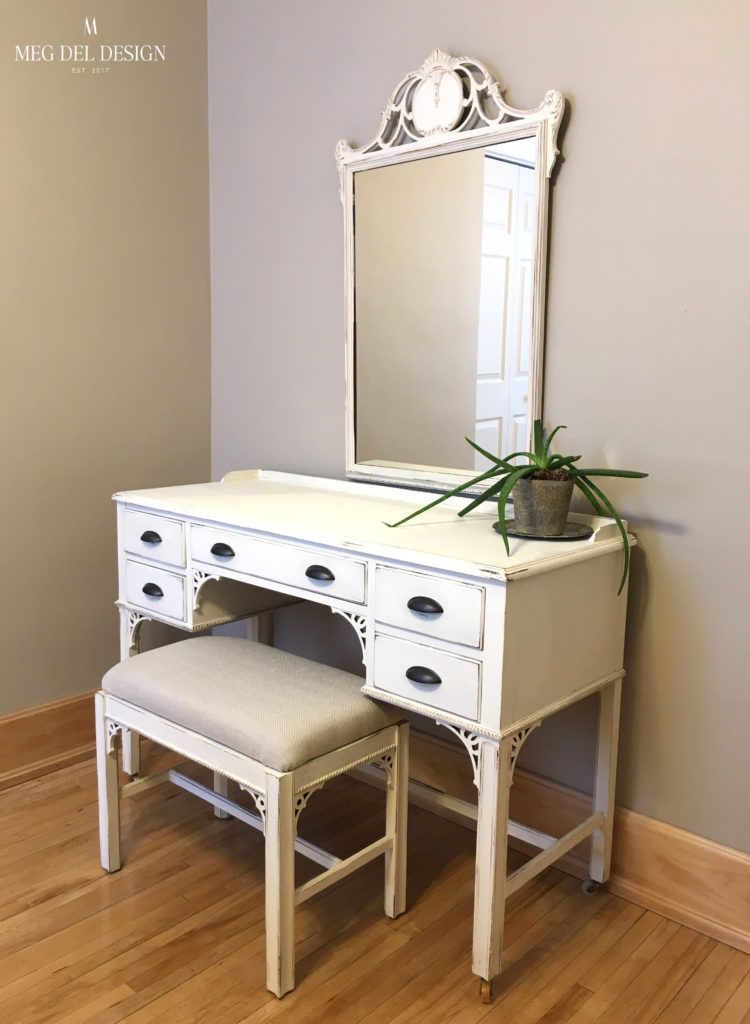
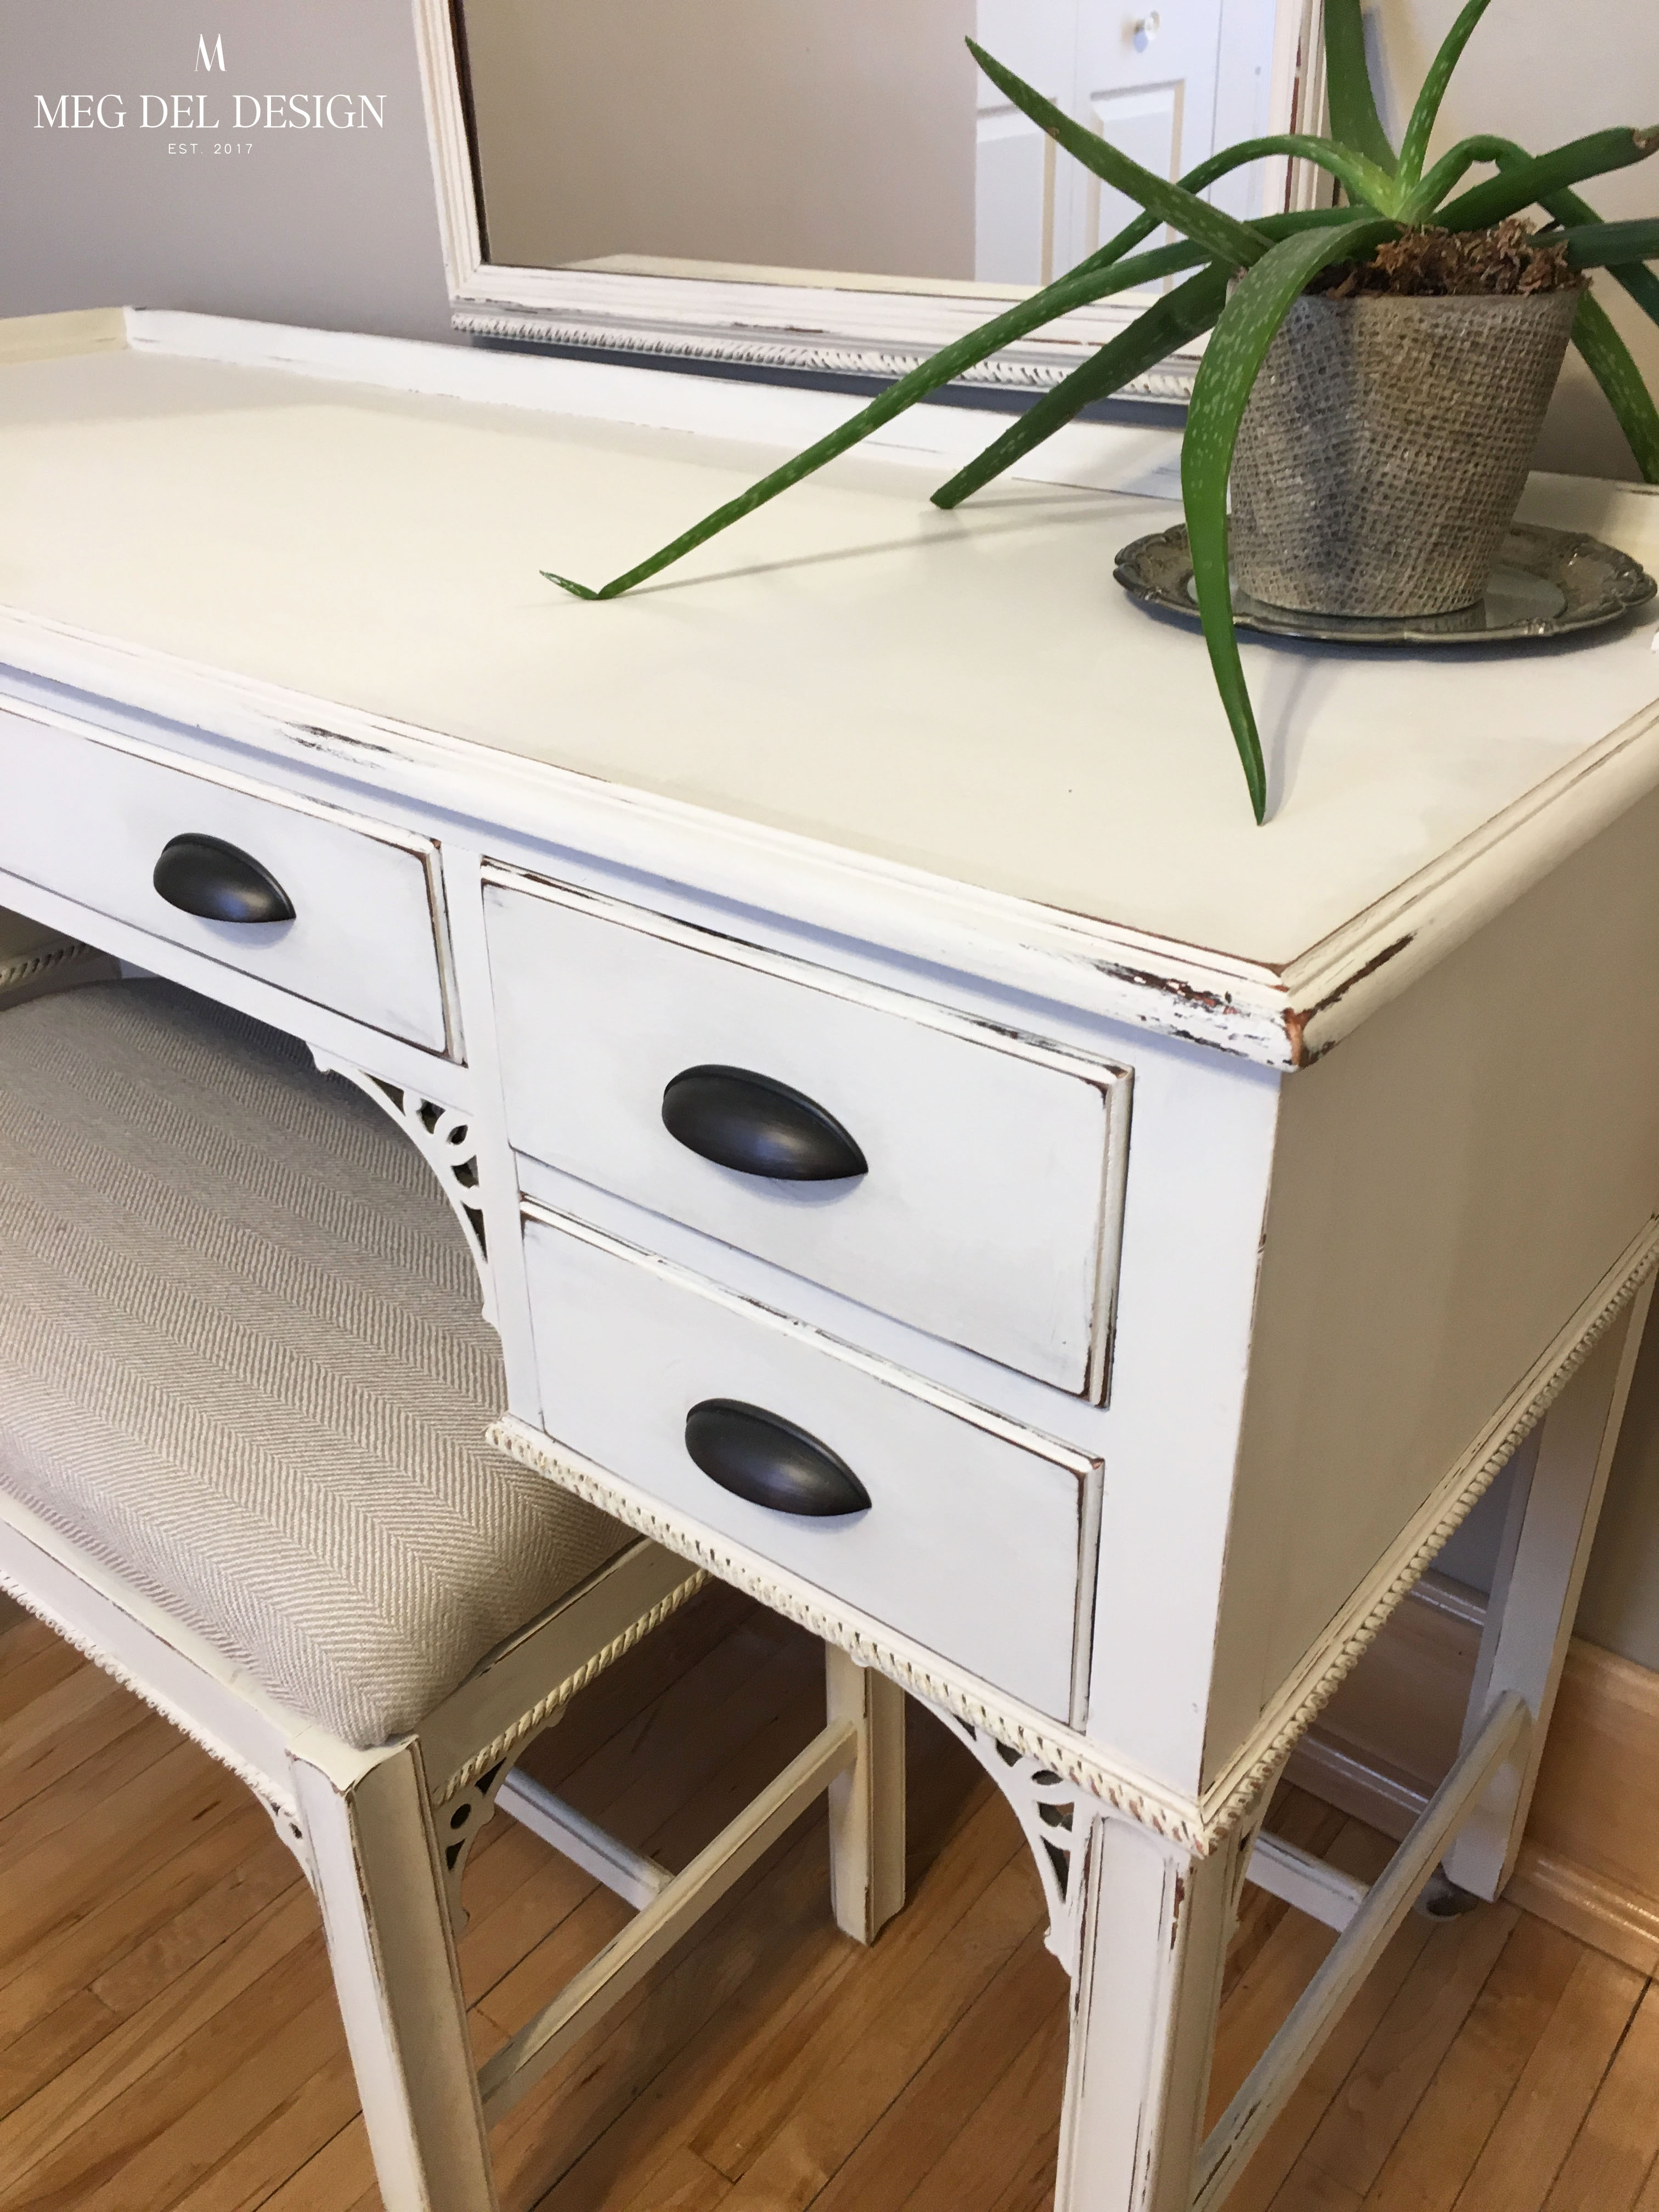
After – Annie Sloan Chalk Painted Vanity
Vanity Makeover Step-by-Step Process:
Here is the full process and products I used to achieve this makeover! *This post contains affiliate links
CLEAN AND PREP:
- Removed hardware
- Cleaned entire piece with Simple Green
- Let air dry
PAINT:
- Painted three coats of Annie Sloan Old White Chalk Paint
- Let dry completely after each coat
- The 3rd coat I added a little water by taking a spray bottle and spritzing water on a the wax paper next to my paint.
- With a little paint on my brush, I brought it to the water, swirled it around, allowing some to collect in the brush
- Watering it down slightly helps the paint glide on easier and cover any brush strokes from the previous coat(s)
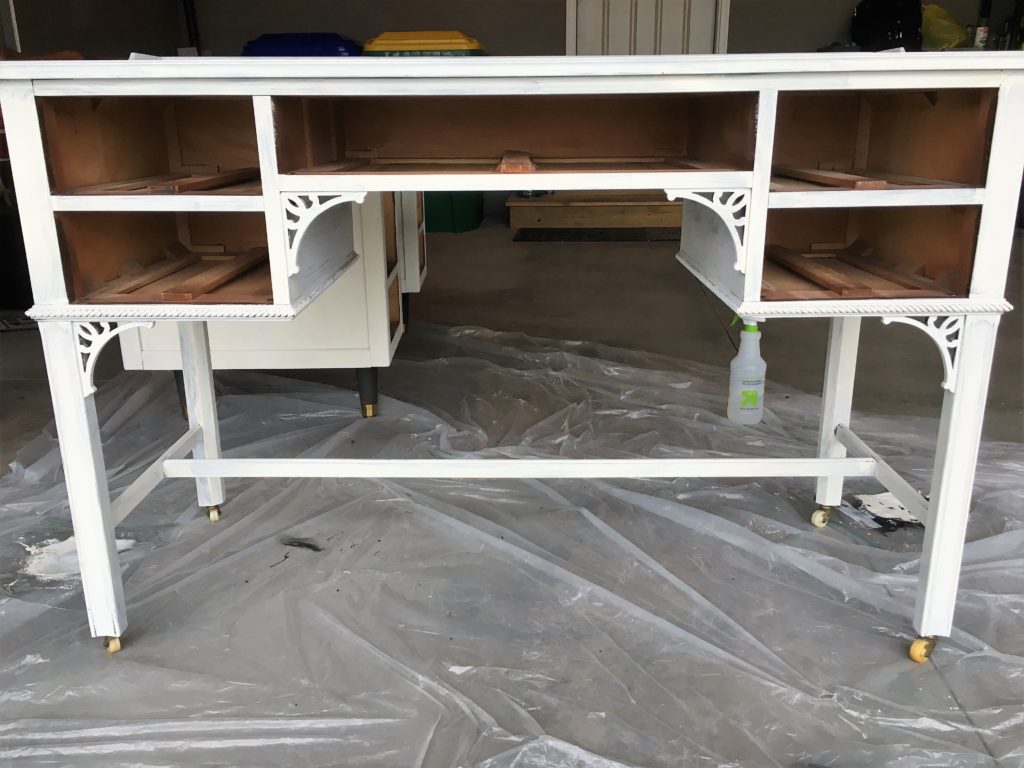
After 2 Coats of Chalk Paint
*Note – due to the cherry-toned wood finish I was covering, it took more paint than usual. Two coats tends to be my sweet spot for pieces using Annie Sloan, but this took me three.
*HELPFUL TIP – if you experience bleeding from a piece like this (meaning a little pink or dark color that comes through after you apply your paint) you will want to use a product called Shellac to seal in the tannins that are coming through. I will have a post on this process soon from my kitchen cabinets – but in the meantime know that you won’t want to waste more paint by covering it with additional coats. Instead, stop painting and cover the area with 1-2 coats of Shellac. It will seal your piece from these marks, and then you can proceed with painting! Make sure to get the clear shellac so it does not yellow.

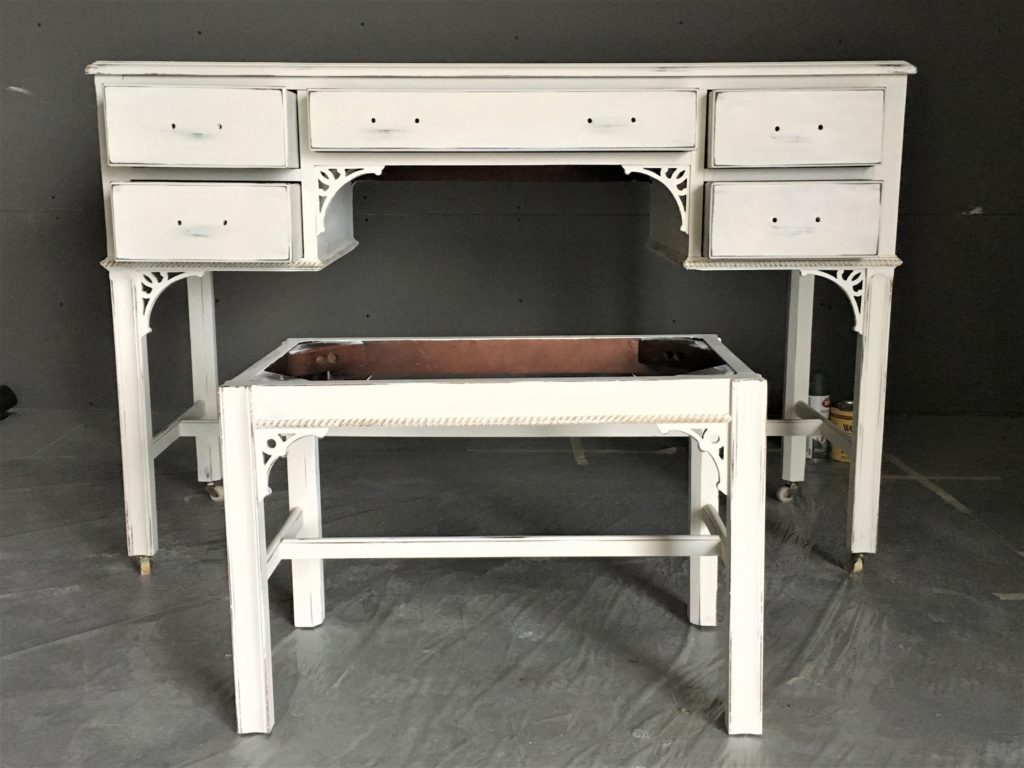
After 3 Coats of Chalk Paint and Distressing
DISTRESS:
- Distressed with 150 grit sanding block. I really like using the 3M blocks with the edges
- I sanded the edges, the drawers, and under the handles until I revealed some of the wood underneath
- Removed dust from distressing
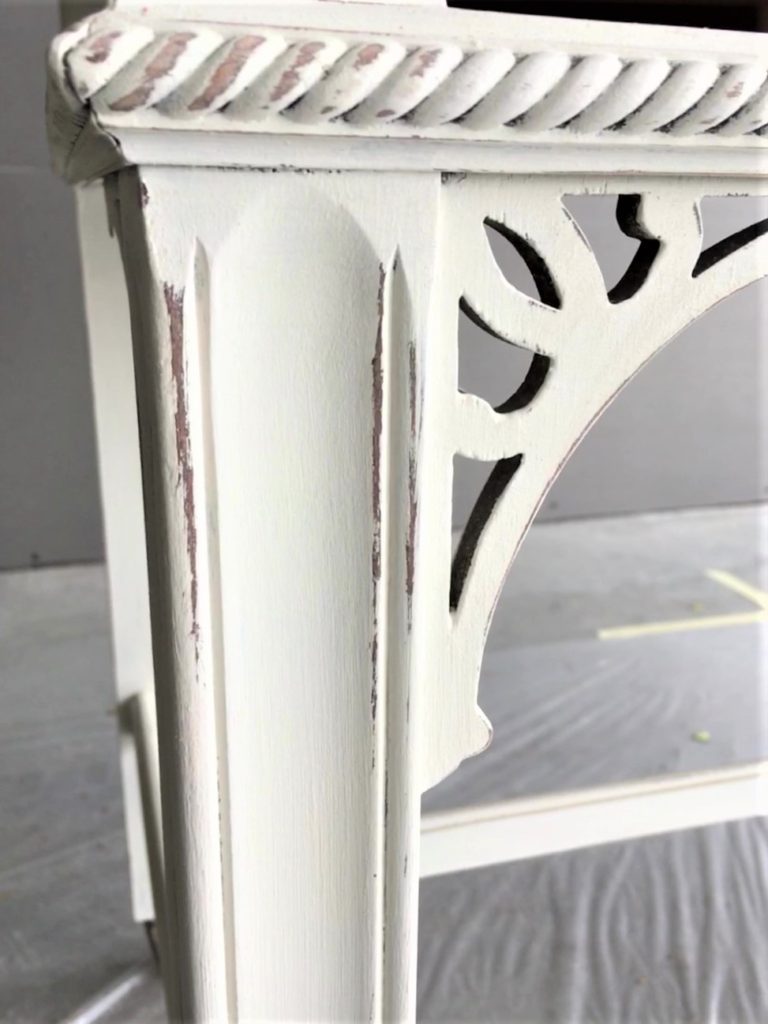
Distressed Edges with 150 Grit Sand Paper Block
FINISH:
- Sealed with Annie Sloan Clear Soft Wax using her wax brush
- Let absorb for an hour or two
- Buffed with a lint-free rag to a subtle sheen. I have a nice big box of these rags, which I find work well and make for easy cleanup – just toss when you’re done!
- Added Bright Gold Annie Sloan Gilding Wax to the details and edges
- Used 0000 Steel Wool very lightly over areas where the Gilding Wax was heavy to give it a naturally worn look
OTHER DETAILS:
- For the hardware, I used oil-rubbed bronze cup pulls from Doorcorner.com They were quick to deliver and the perfect size and color.
- For the bench, I replaced the cushion with a new 2″ thick poly foam, batting, and a neutral herringbone fabric from hobby lobby.
- I used my Dewalt hand-held stapler to reupholster it
- Now it is clean & comfortable!

So much of my motivation to create and be successful comes from wanting to give back to mom and thank her for all she has done for me. I think that is why I love looking back on some of the projects I have had the chance to do even a sliver of that. This vanity makeover is one of my favorites I have completed for her so far and most certainly will not be the last.
If you have any tips, tricks, or questions on the process I used for this vanity makeover, drop a comment below!
Interested in creating a more textured look? Learn the step-by-step process to get a crackle finish here.
This post contains affiliate links, which means if you make a purchase through one of the product links, I will receive a small commission. Don’t worry, you won’t be charged anything extra. This just helps keep the site running & goes right back into my business!