Furniture Flip on a Budget
After I got a taste of what was possible with chalk paint from my furniture painting class, I wanted more! I wanted to practice and learn all I could by taking my new Annie Sloan brush to anything and everything I could get my hands on. I wanted to test my luck at flipping furniture. Since I was just starting out, I tried to keep my initial investment in pieces low. I turned to Craigslist and let me tell ya, I was not disappointed. I found a few for $5.00 each!
Thinking about those first pieces, I remember feeling a few things. I remember being so excited as I coordinated my first pick-ups. I couldn’t stop thinking about which piece I would work on first, and what colors I would paint them! I have to admit though, under all the excitement I also felt a bit of something else; guilt. At the time we were planning our wedding. After already spending $200+ on supplies and then adding furniture costs to the total, I felt selfish. I kept thinking to myself, “you should be saving money,” and, “shouldn’t you focus more on ‘real’ work,” and, “be realistic, you’re not going to make any money flipping these pieces.” Isn’t it crazy how we can convince ourselves we don’t deserve something? It’s almost like my mind was trying to protect me from moving into dangerous territory.
Looking back on it now, I know the guilt I was feeling stemmed from fear; fear that I was about to open myself up to something that had the potential to change everything (and it did!). You wanna know how I shook the guilt? I reminded myself of a few things. 1. You can’t put a price on the small things that make you happy. 2. Continuing to learn and better yourself is priceless! & 3. They were $5! Some people spend $5 every day on a Starbucks coffee.. so I could spend $5 on practice! I was making an investment in building my craft, and I am so happy I did.
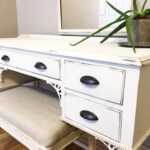
Without further ado – my favorite $5 furniture flip! I loved the chunky accents on this piece and a two-tone look pulled on my heartstrings for it.
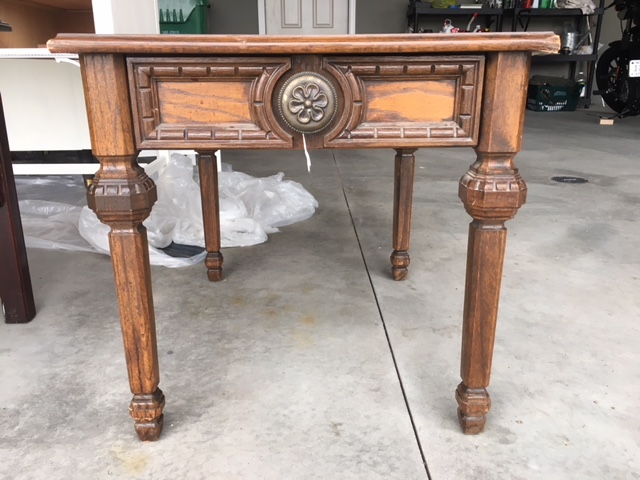
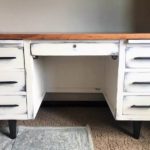
Here was my process for the top:
- Clean: I scrubbed the top with simple green and rinsed with warm water to remove the dust and grime and let air dry
- Prep Surface: 220 grit sandpaper to prep the top for stain and removed the excess dust
- Stain: General Finishes Java Gel Stain (2 coats) I painted it on for a very solid, rich finish vs. the wipe off method
- Top Coat: General Finishes High Performance Top Coat: Satin (3 coats; sanded lightly in between coats)
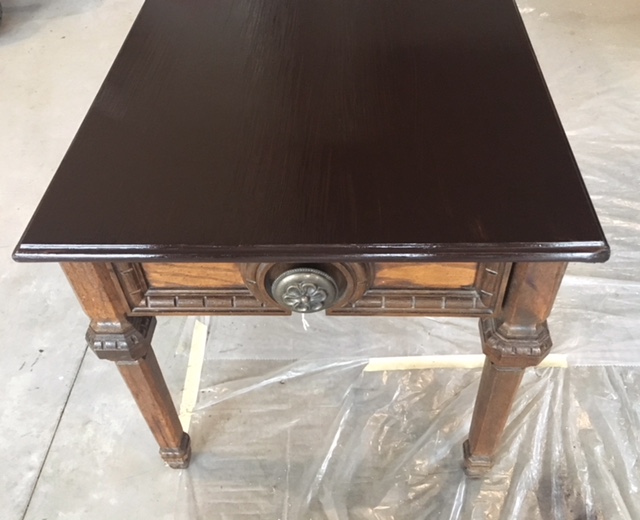
Here was my process for the base:
- Deep clean: The grooves had a ton of dust, so I scrubbed this baby with the same process as the top
- Removed hardware
- Paint: Annie Sloan French Linen (2 coats)
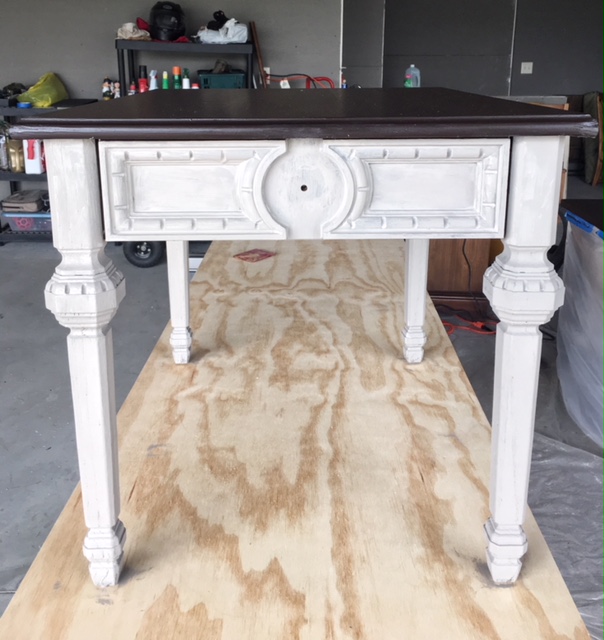
- Distress: 150 grit sandpaper to distress the edges and areas that would naturally wear. Removed sanding dust
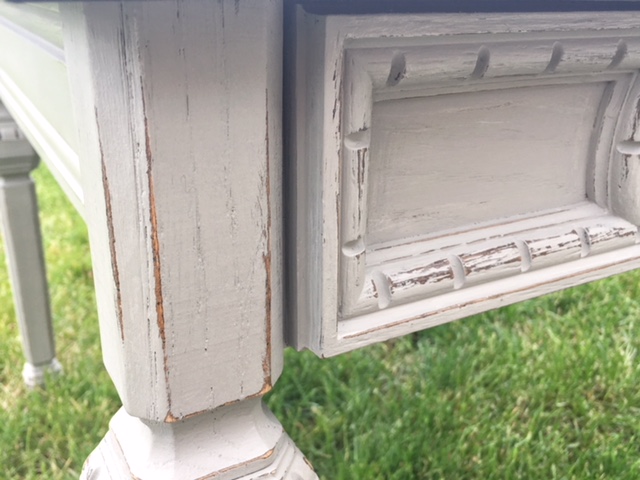
- Wax: Annie Sloan Clear Soft Wax and buffed to a nice subtle sheen
- Hardware: Finished off with a gorgeous glass knob from Hobby Lobby (They tend to go on sale every other week – 50% off!)
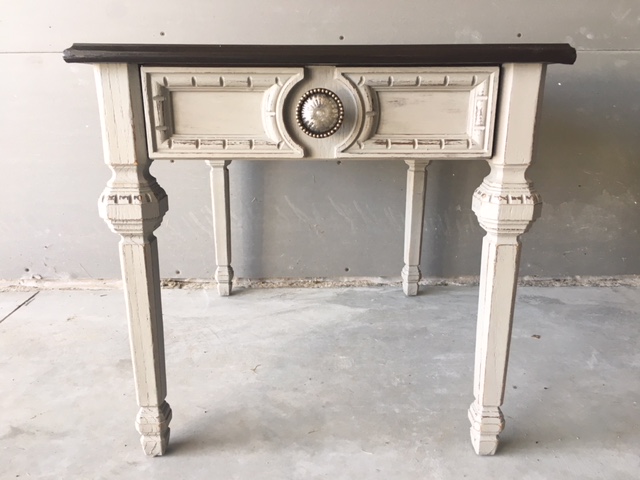
Moral of the story; spend the $5! My total with supplies probably came to about $15-$20, and guess what? It was worth it! Not only did I prove my scared thoughts wrong and made money on this piece, but most importantly, I learned how to use new products and had a blast transforming it!
This post contains affiliate links, which means if you make a purchase through one of the product links, I will receive a small commission. Don’t worry, you won’t be charged anything extra. This just helps keep the site running & goes right back into my business!