Annie Sloan New Paris Grey Chalk Paint Review
For anyone who has used Annie Sloan Chalk Paint, you know how amazing this paint is! For those of you still waiting to take the plunge, let me just leave this here… Beyond the little to no-prep required, Annie’s Chalk Paint can be painted on almost any material and leaves you with a gorgeous, velvety finish that looks beautifully rich when wax sealed for protection. Did I mention there are TONS of colors too? This mean limitless color mixes, layering techniques and more. (Ps. This is not a sponsored post, just genuine love for this paint after using it for years.)

Exciting Things!
Annie Sloan recently added a new Grey to her line called Chicago Grey. For those of us in the U.S. this is actually the color previously known as Paris Grey. You still with me?! This color has a blue undertone giving it a light bluish tint, overall.
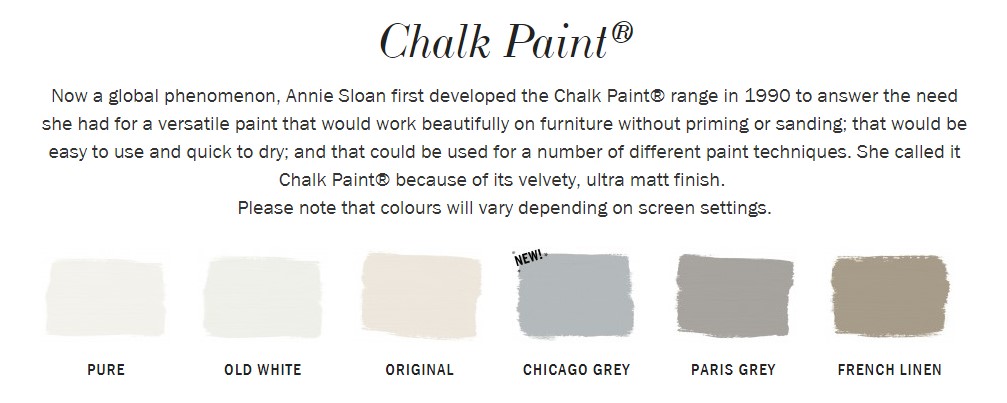
Here is the exciting news! The new Paris Grey is now a more, true grey! Whereas before there wasn’t a great option (except for custom mixing a light grey), now this color sits perfectly between Chicago Grey and French Linen. (French Linen is one of my favs – check out this flip I did with it!)
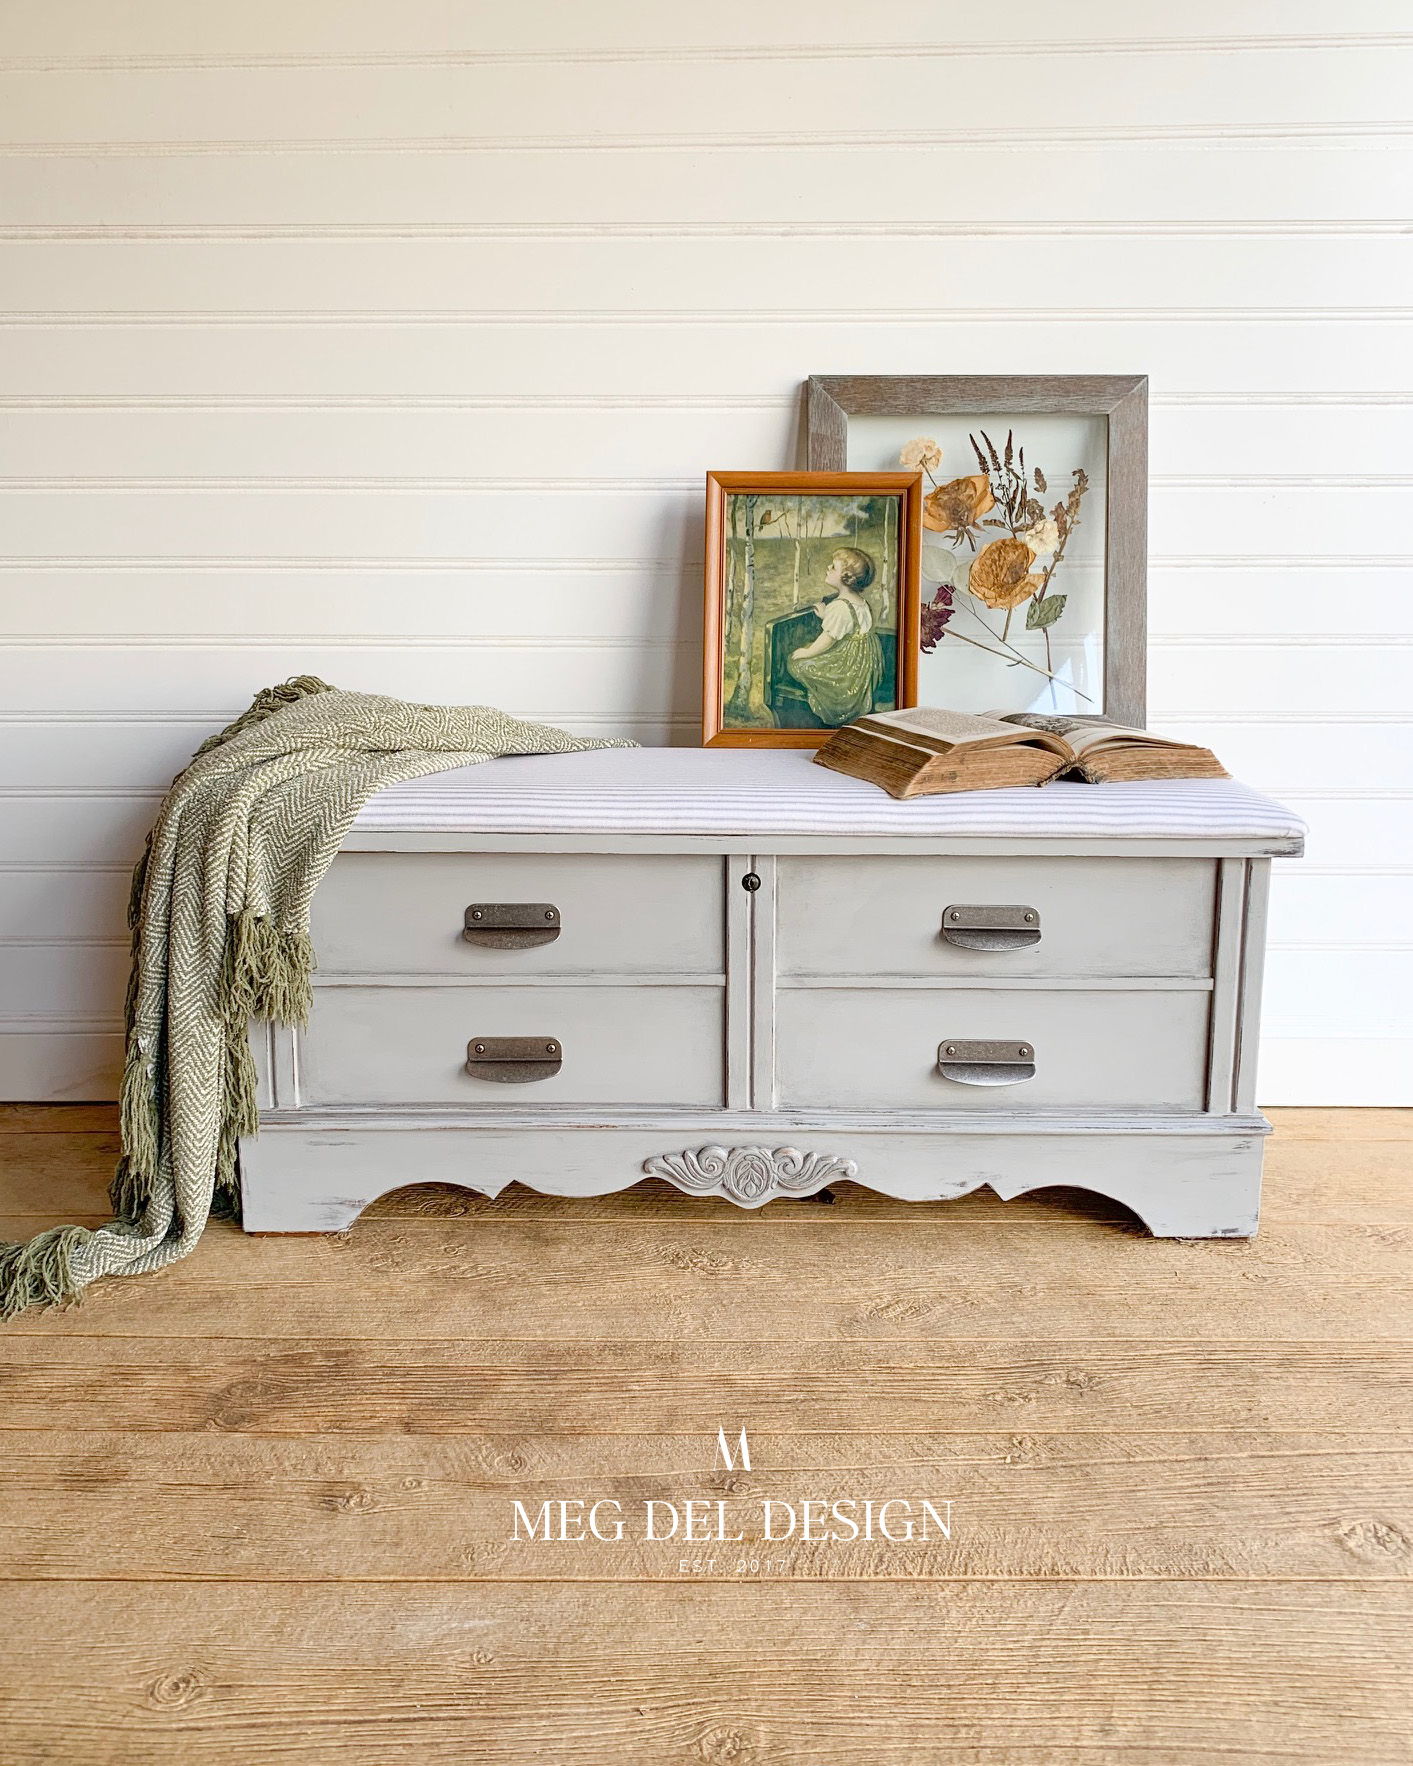
My amazing employer and Annie Sloan Stockist, Time for Décor in Green Bay, Wisconsin gifted me with a few quarts of paint for Christmas, the new Paris Grey Chalk Paint being one of them! I may be biased but talk about the sweetest gift! I barely made it home before I started painting a Lane cedar chest with it.
CHALK PAINTED LANE CEDAR CHEST PROCESS:
Here was my process and review of the end result of the Paris Grey Chalk Paint!
PRODUCTS:
- Simple Green
- Annie Sloan Paris Grey Chalk Paint
- Wax Paper
- Spray Bottle
- Zibra Triangle Paint Brush
- Annie Sloan Clear Wax
- Annie Sloan Black Wax
- 220 Grit Sand Paper
- Tack Cloth
- Lint-Free Rag
- Magnolia Hardware Pulls
- Fabric

PREP PROCESS:
- Removed top, including cushion and hardware.
- Cleaned entire chest with simple green and a rag and let the entire piece air dry.
Annie Sloan Chalk Paint requires little prep work like priming, BUT it is very important you clean your piece completely. This means removing dust and any build-up of substances on your piece to ensure a smooth finish.
PAINT PROCESS:
After opening the can, which is now a liter size (aka WINNING, because this means more paint for the same cost), the paint was so creamy, and beautiful!

- Like any paint, mixing is essential to make sure all of the color pigment is mixed evenly for a cohesive finish.
- After mixing, I painted 3 coats of the Paris Grey Chalk Paint with my triangle Zibra Paint Brush.
I love using this brush when I have pieces with a lot of ridges and corners because the triangle point fits perfectly in them. It covers all of the small areas without having to jam a paintbrush that is too big into them. It saves me time and I don’t get a ton of extra buildup of paint or missed spots.

- On my 2nd and 3rd coat applying the Paris Grey Chalk Paint I added a little water by using a spray bottle of water and spritzing a little on a piece of wax paper.
- I brought my brush with paint on it to the wax paper to thin the paint slightly. This makes the paint a little more workable given how thick it can be. It also covers any existing brush strokes from the first coat.
- TIP: Just make sure not to add too much water to avoid any drips. Also, do not add water directly to your paint can.
REVIEW OF THE PARIS GREY CHALK PAINT COLOR:
After painting the 3 coats of Paris Grey Chalk Paint, I have to say, I really liked the color compared to Chicago Grey and how blue I always considered it to be. However, I was surprised it didn’t look a little more like the swatch Annie’s website showed, which appeared to be a little darker. I felt like the color was rather light and still teetering on the blue scale versus grey, but I was very pleased with the way it turned out on this chest. Let’s be honest, I am a sucker for “light and bright” finishes!

I turned to my finishing steps to darken it up a tad.
FINISH PROCESS:
- I distressed the edges of the chest and some small areas near the bottom where natural wear might occur using 220 grit sand paper.
- To remove the dust from distressing I used a tack cloth.
- Next, I sealed the entire chest with Annie Sloan Clear Wax using her wax brush.
- The wax sat and soaked in for roughly an hour before I came back with a lint-free rag to buff the excess away to create a soft, subtle sheen.

- Because I wanted to darken the piece and create a little depth, I decided to add a little amount of Annie Sloan Black Wax to the corners and ridges. This helped deepen the color and create a slightly worn/aged look.

- I added Magnolia aged pewter pulls to modernize the chest a bit. I also thought they went with the Paris Grey Chalk Paint color nicely!
- Lastly, I reupholstered the bench seat with a fresh white and grey striped fabric from Hobby Lobby.


With new fabric, modern pulls, and of course, a fresh paint job this 1988 Lane cedar chest has been brought back to life. Overall, I am so happy with the way it turned out and I really do like the new Paris Grey Chalk Paint color. I am excited to see how additional pieces take the paint and if I will find a more “grey” outcome in those, but there is no complaining on this light and bright finish!

What do you think? I would love to see or hear about your pieces in the new Annie Sloan Paris Grey Chalk Paint. Drop a comment below!


TereseJanuary 12, 2019 3:16 am
Megan, this is such a great flip for a classic storage bench! Your color scheme with Annie Sloan paints and the Magnolia hardware bring this piece to life again!
Megan DeLongJanuary 14, 2019 3:05 pm
Thank you so much! It helps to have a great, solid piece to begin with. Thank you for letting me steal this one from you and give it a new life! -Meg