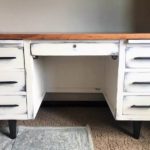
Tankers Desk: Part 2
Growing up my dad was always doing some sort of project around the house, and most of the time it included woodworking. My mom will joke that all we have in the house is wood because he refuses to paint it! Funny how that’s exactly what I love to do (sorry dad). I think that may be why when I see a piece that allows me to restore or refinish some of the wood, a little voice inside begs me to keep it. That voice won me over for the top of this solid wood tankers desk.
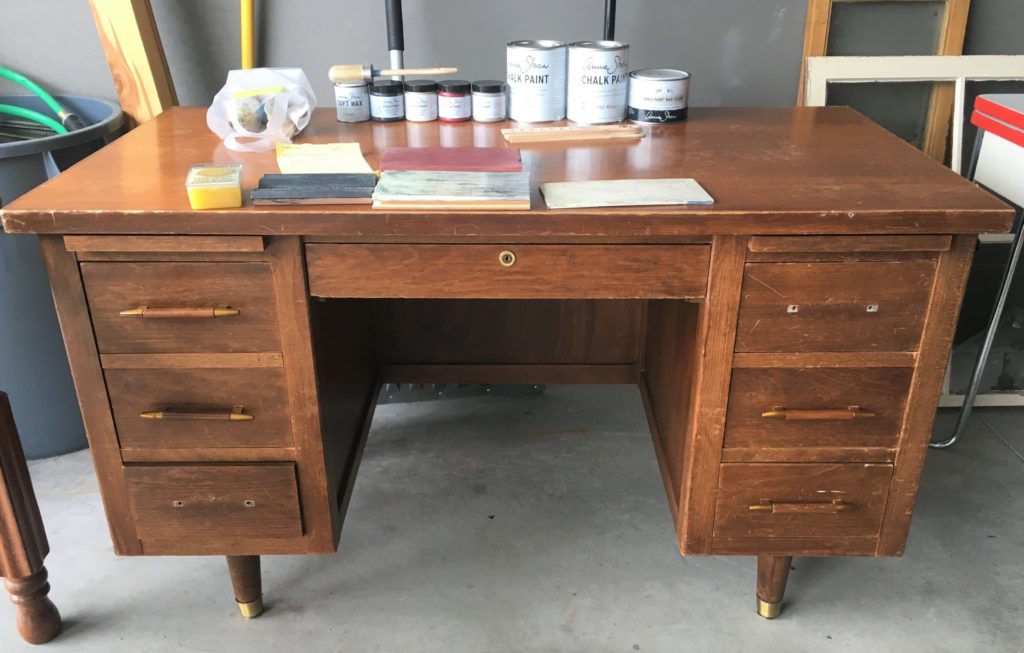
The top was very scratched and appeared to have multiple existing layers that were chipping and inconsistent. I knew I would need to even out the surface to achieve a smooth, new finish. That meant it was the perfect time to take on a new challenge – stripping the existing wood finish.
This was my first time stripping a piece of furniture, and I was a little nervous hearing how messy and difficult it could sometimes be. After looking up different products reviews, I found Citristrip recommended quite a bit for being safe and having a nice smell compared to other options.
My local Home Depot carried it, so I gave it a shot!

STRIPPING PROCESS + PRODUCTS:
1. Put on my bibs, gloves, and safety goggles
2. Kept the garage doors open so I had good ventilation but not in direct sun
3. Poured some of the CitriStrip stripper onto the top and used a 2-inch foam brush to apply it liberally
4. Applied long brush strokes, with the grain and made sure to cover the sides and edges
5. Let stripper sit for at least 30 minutes to do its job– old finish started bubbling up which is good! *can leave up to 24 hours
6. Took my plastic scraper and had an old bucket to scrape the softened, old finish into
7. Used mineral spirits and a rag to wipe the surface clean and remove the excess stripper
8. Sanded the top with 200 grit sandpaper and wiped away the sawdust
I was really impressed by how well the stripper worked and the ease of it compared to the intimating expectations I had. However, I still had a few big takeaways as I continued in my process.
Patience is a Virtue I am Still Learning
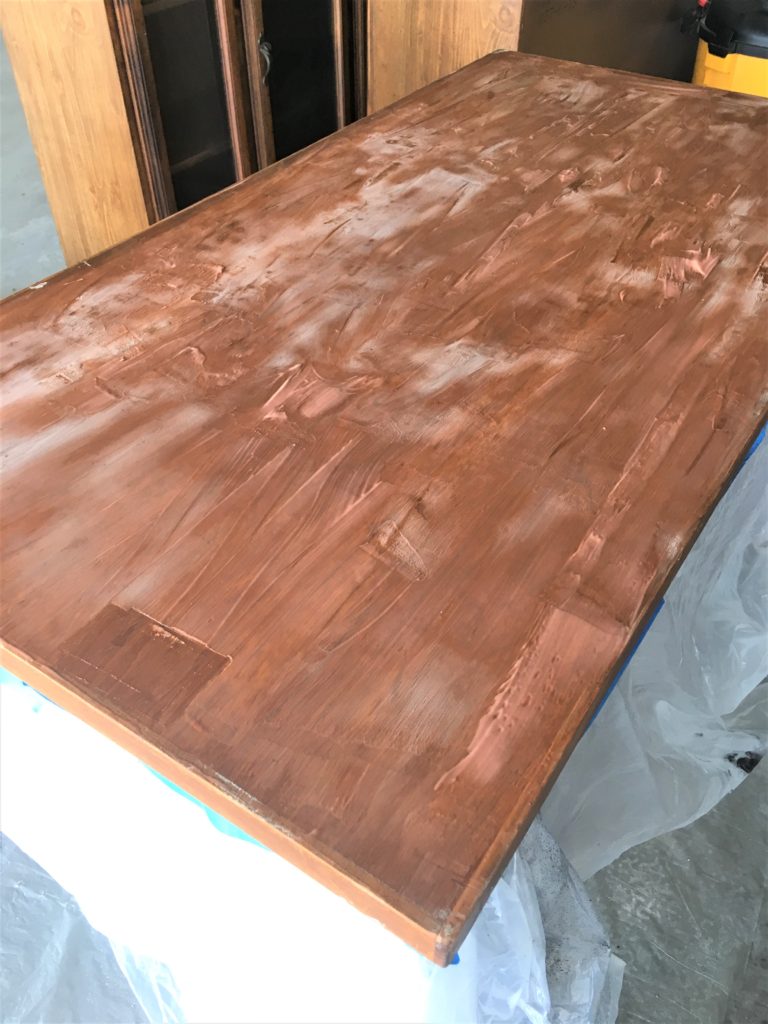
In part 1 of this desk makeover, I admitted to my sometimes lack of patience. (Case-in-point in my next steps to transform this top). After my first application and removal of the stripper, I thought I’d be ready to stain. However, I saw a few areas that appeared to have some of the old finish remaining. Overzealous, I figured I’d just add more stripper to these and be good to go. I followed my same process above but just on those areas.
Well, guess what? When I applied my General Finishes Gel Stain I noticed those same areas looked different than the rest of my top. I was so excited to see what a new stain would look like, I didn’t look up what to do next or make sure it was 100% ready before applying my stain. I thought maybe the stain would cover the slight difference (since I used the paint-on method). Wrong! There was a small difference in how the finish took, but to me, it was glaring.
Takeaway #1, 2 & 3: I should have applied a full second layer of stripper, let it sit longer before scraping, and sanded it completely smooth to make sure I had an even removal across the top.

I asked Mike if he could tell and of course, he let me down gently. I wanted to finish the desk, but I also wanted it to look great. Thinking about the time I already put into stripping it twice and the process to fix it was a little disheartening. Thankfully, like encouraging a sad little kid, Mike built me back up reminding me, “It’s ok to not get it perfect right away, and just think how awesome it will look when it’s done right!”
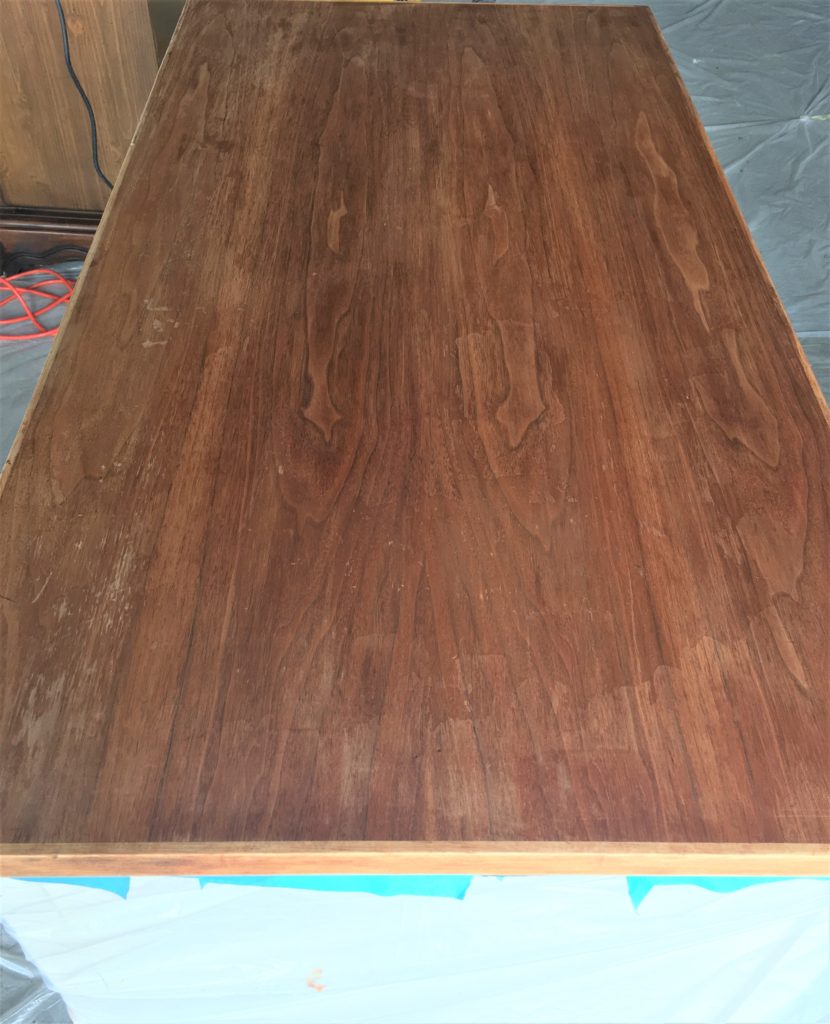
Stripping Round 3 and 4
So, guess who got some more practice stripping wood furniture? This girl. I stripped all the gel stain off, leaving the stripper on longer – roughly 45 min to an hour. After two applications to the entire top to ensure I removed the finish evenly, I used an abrasive pad to guarantee all the excess stripper was removed. Then, I sanded generously using my orbital sander with 150 grit sandpaper. These made a huge difference in getting down to the bare wood.


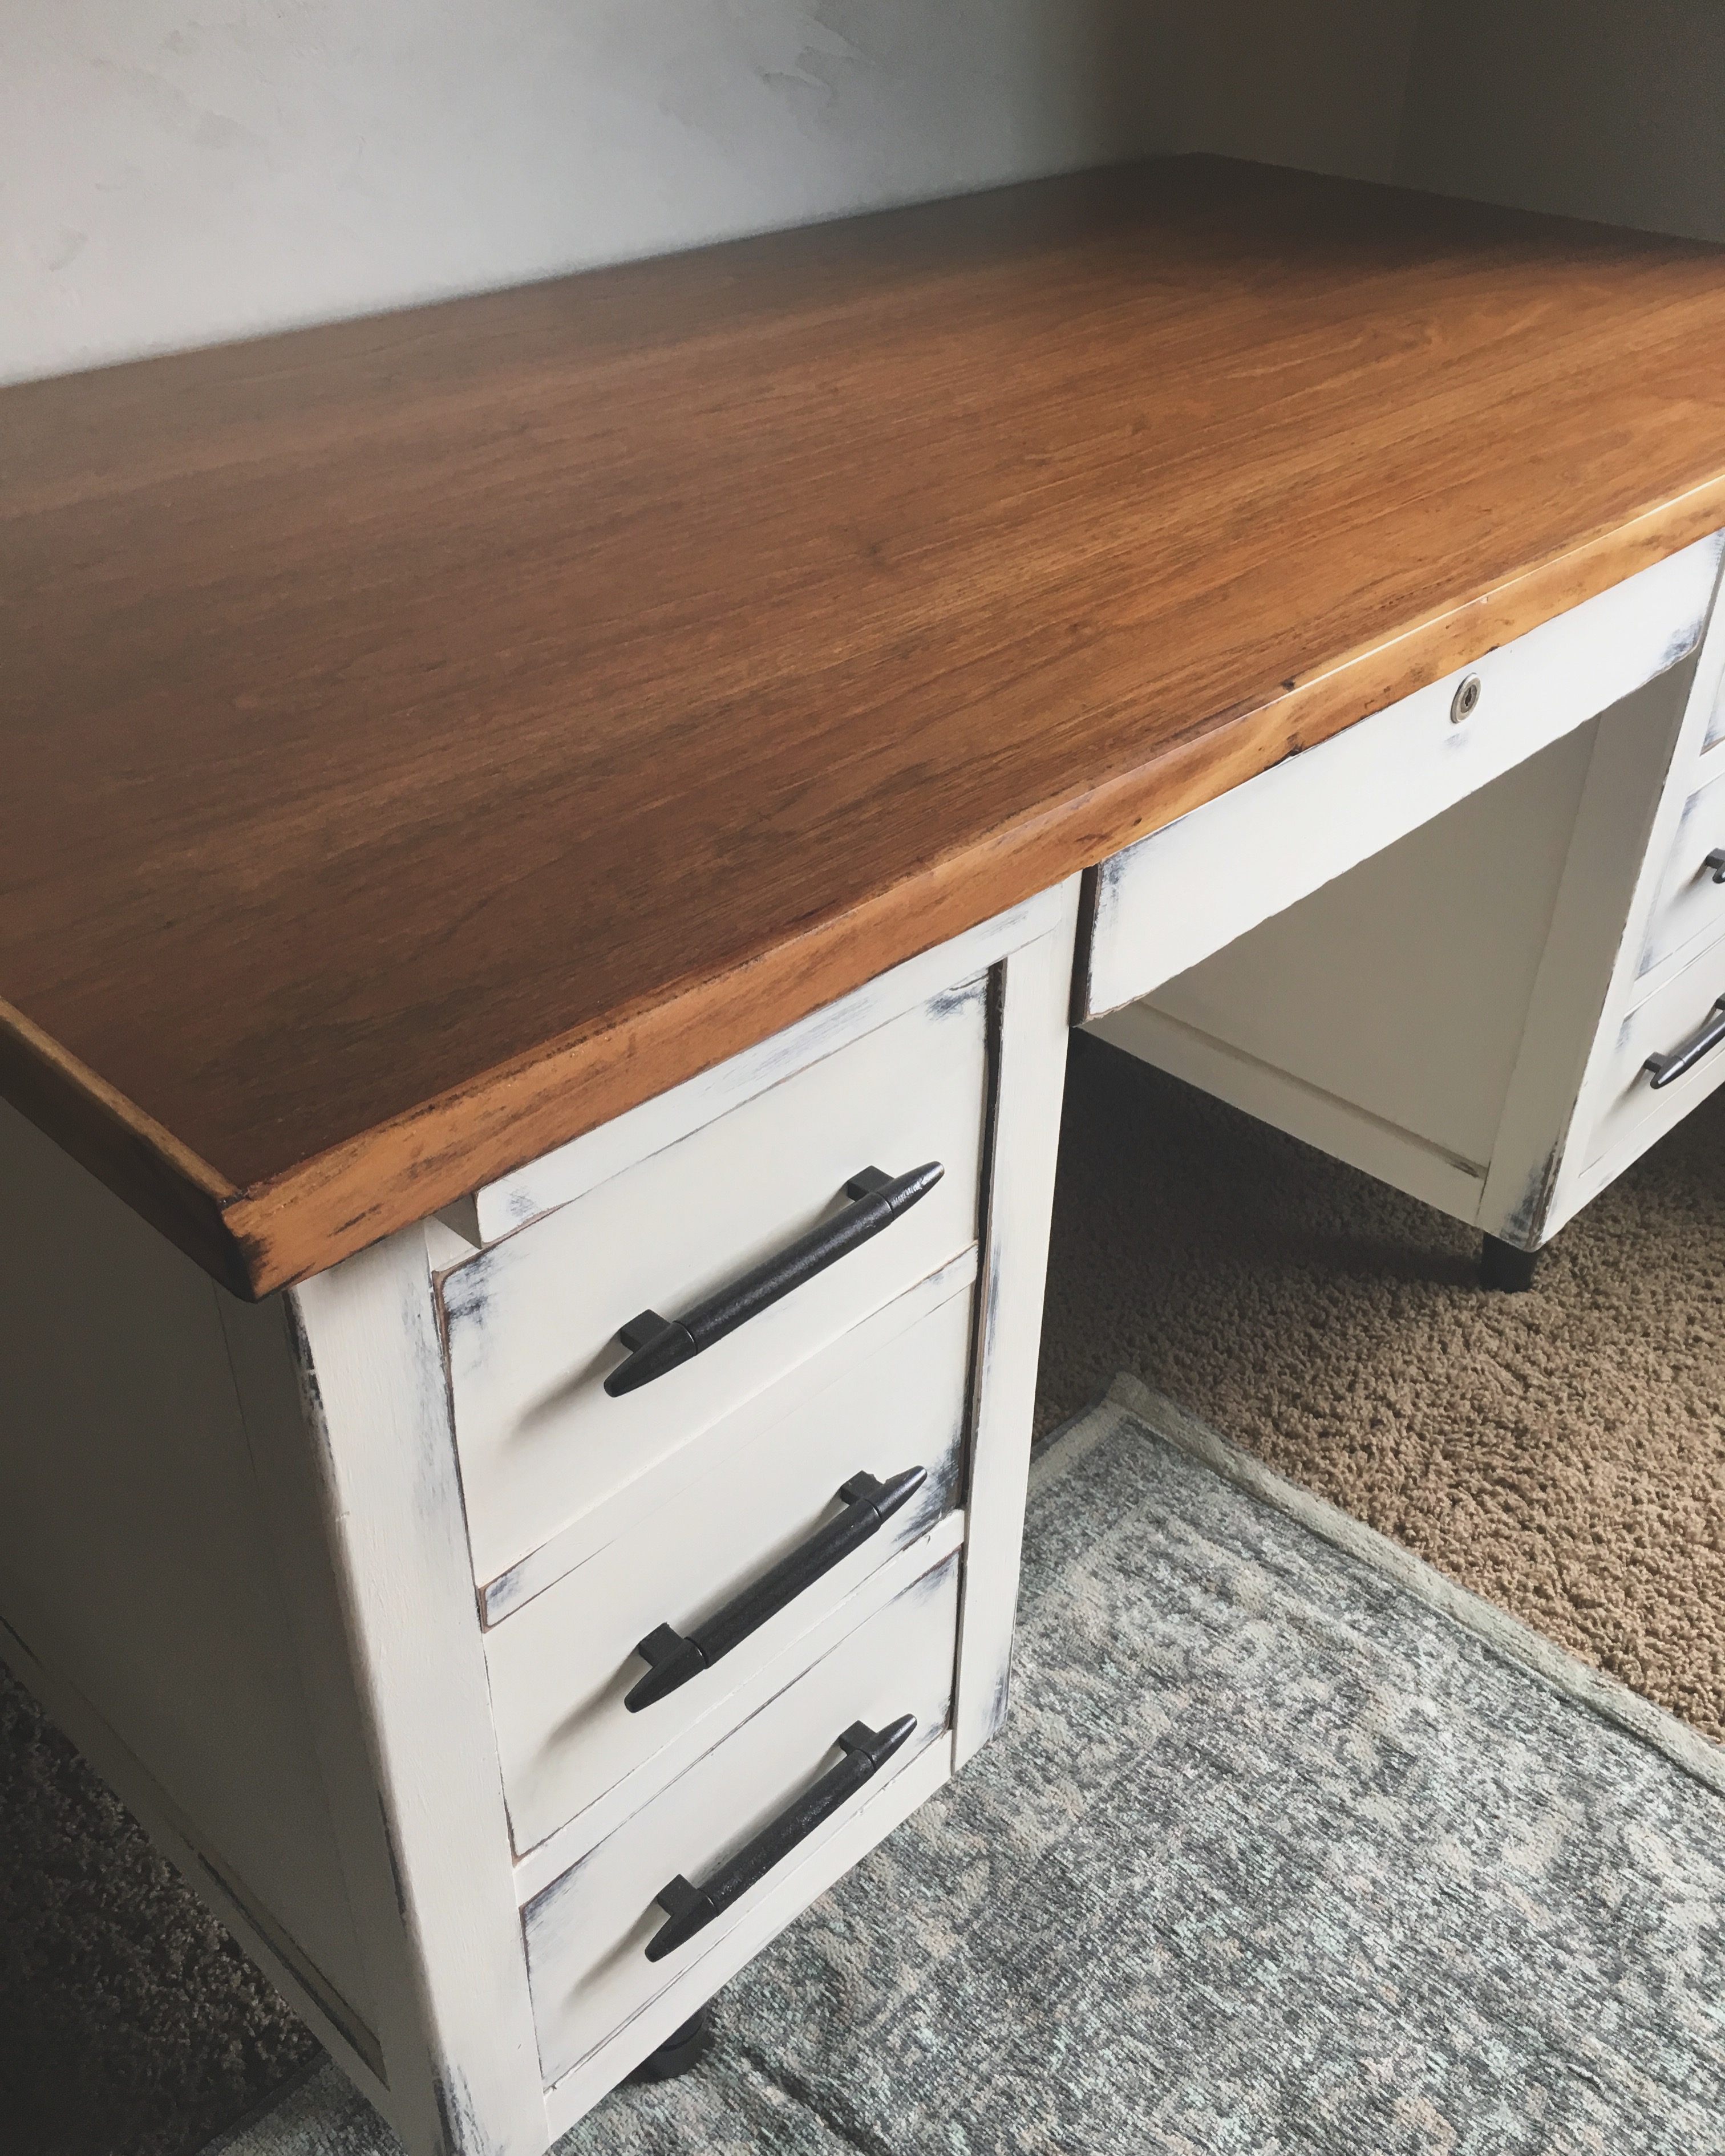
I was determined to get it right and made sure to slow down. In doing so, something cool happened. My vision for the top completely changed. After putting a ton of work into prepping the surface for stain, the wood grain looked more beautiful than ever. That little voice I mentioned earlier started speaking up, telling me I needed to show off the gorgeous grain I had just exposed in all of its warm, natural tones. So, that is exactly what I did.
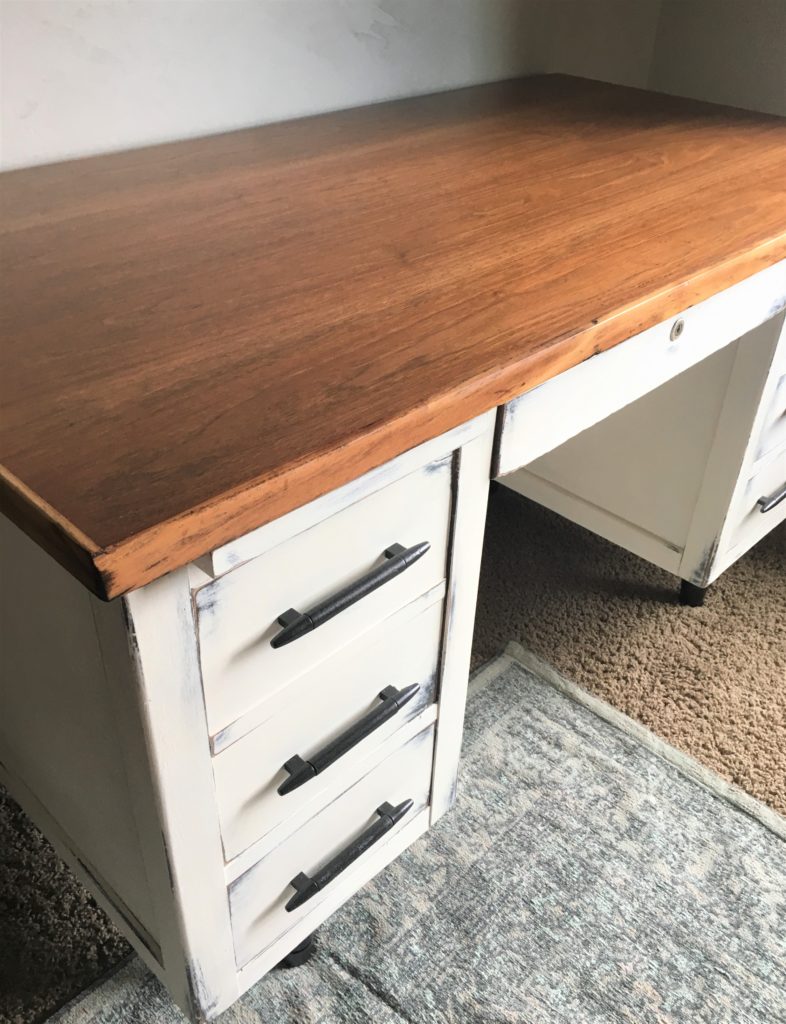
FINISH PROCESS AND PRODUCTS:
1. Preconditioned wood surface with Minwax pre-stain to make sure my topcoat took evenly
2. Applied 1 coat of Minwax Polyurethane in Satin with my Purdy brush and let dry
3. Once dry, lightly sanded with a 220 grit sandpaper block to prep the surface for my second coat
4. Applied 2nd coat of Poly
I was so pleased when I saw that final coat dry! I asked Mike again for his opinion and this time I could tell he thought it was as great of a transformation as I did. The top fit the overall feel of the desk far better than the dark gel stain. It was so worth the extra time and work that went into achieving the beautifully restored finish.
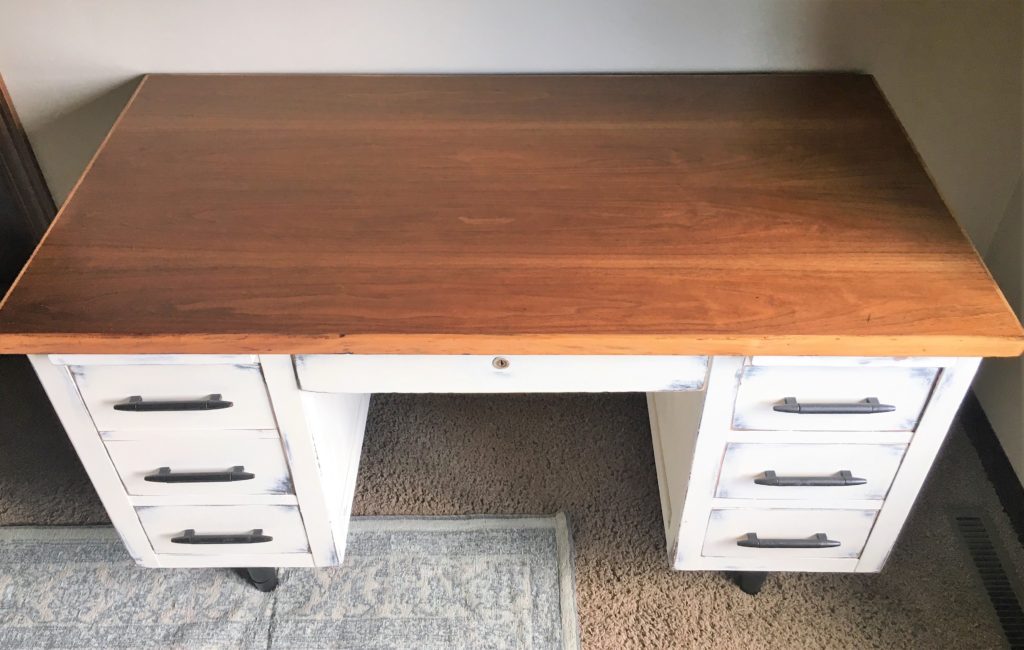
Long story short and another lesson learned: patience is a virtue, but if you don’t always practice it (raised-hand emoji here), you may run into unexpected beautiful results if you are willing to put in the time and effort to make it right!
Secondly, stripping wood furniture can be intimidating, but if you take your time, follow instructions, and make sure your piece is prepped correctly, you can absolutely walk away with a gorgeous new finish.
This post contains affiliate links, which means if you make a purchase through one of the product links, I will receive a small commission. Don’t worry, you won’t be charged anything extra. This just helps keep the site running & goes right back into my business!