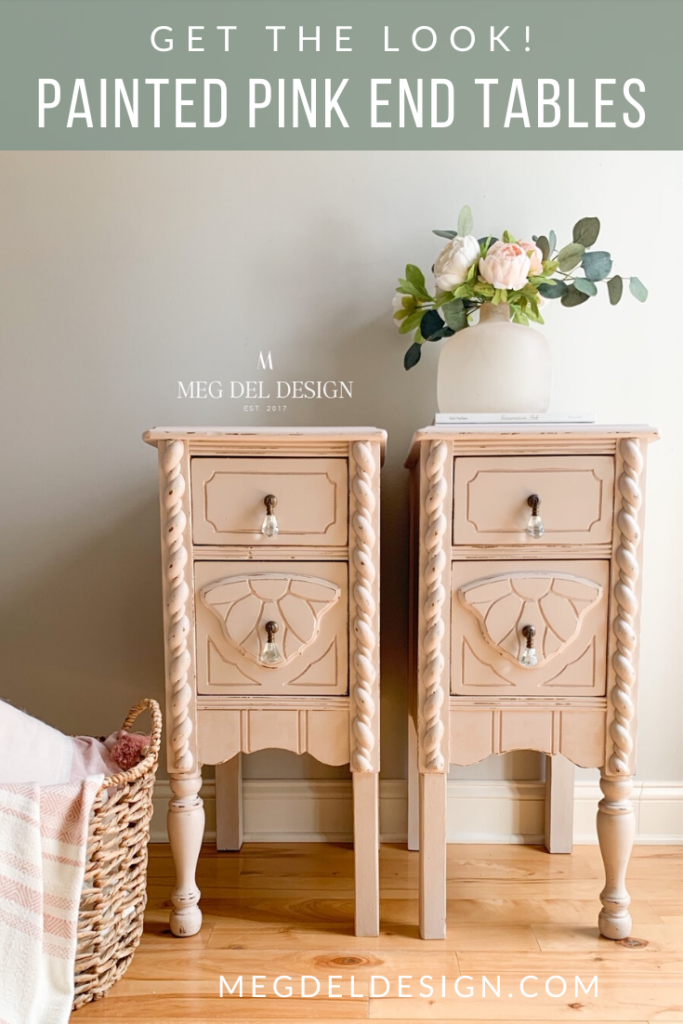
Today marks 38 weeks pregnant with our baby boy! (WHAT!?) I think I’m entering full nesting mode and have been trying to finish his nursery and our spare bedroom for when family comes! While I’ve kept his room, décor, etc. rather neutral, it’s only a little funny I went totally feminine, French-country, with a modern-farmhouse twist in our spare bedroom. That being said, these adorable painted pink end tables were high on my list of to-dos!

When I was planning my design for these end tables, I wanted to keep them rather neutral. I intended to go white. However, a recent dresser project I did totally swayed me to embrace the Spring vibes. So, I decided to go delicately pink!
Picking the perfect pink
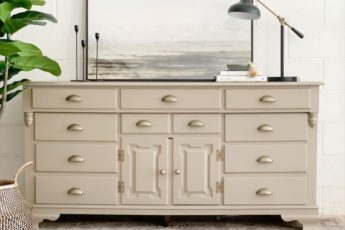
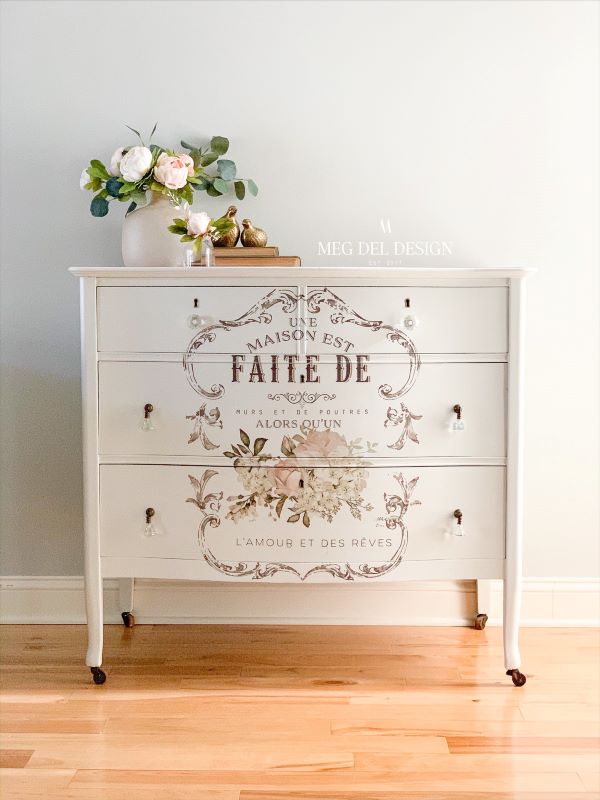
Earlier in the month I finished a collaboration piece with The Chippy Barn and Redesign with Prima to create a beautiful dresser with a furniture transfer applied. I loved it so much I had to keep it for our spare, building the room around it.
As an Amazon Associate, I earn from qualifying purchases. This post contains affiliate links.
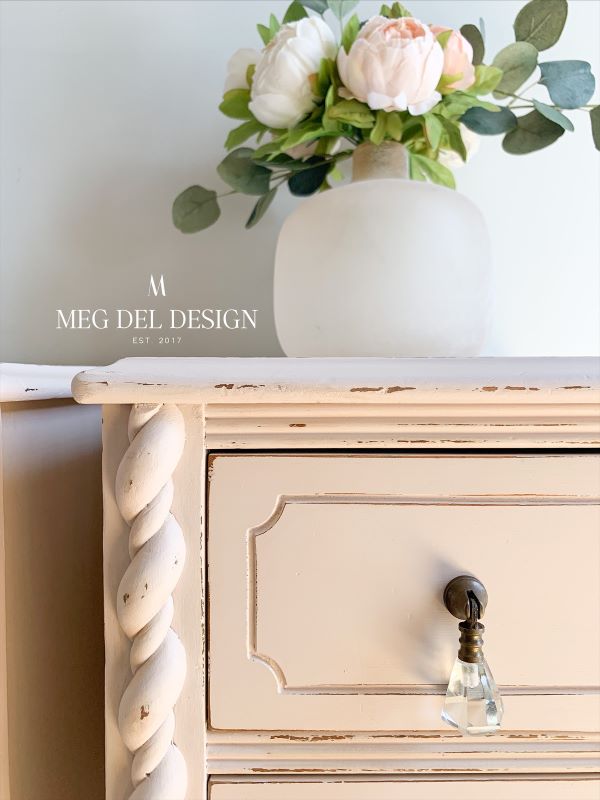
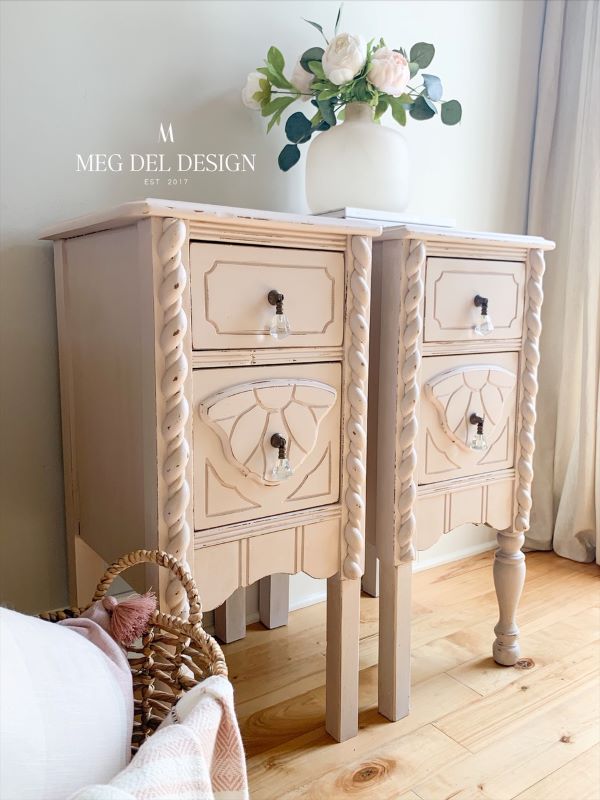
I wanted to play off the feminine details of the transfer by doing a complementary finish on my painted pink end tables. To do this, I chose the color Amelia by the Chippy Barn. The color is seriously the most beautiful, muted, pastel pink with a tinge of lilac in some lighting!

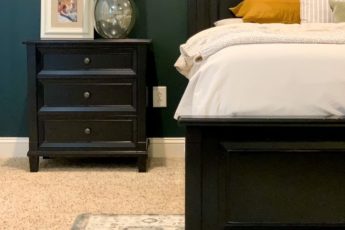
It tied in perfectly with the floral detail and colors from my dresser’s transfer. It also went great some of the décor items I had like this pillow and throw blanket.
Step-By-Step Guide to Achieve Painted Pink End Tables:
The process to get the look of these painted pink end tables follows a few how-to guides I have outlined before! I will link these in the post, plus discuss the addition of one new technique & tool!
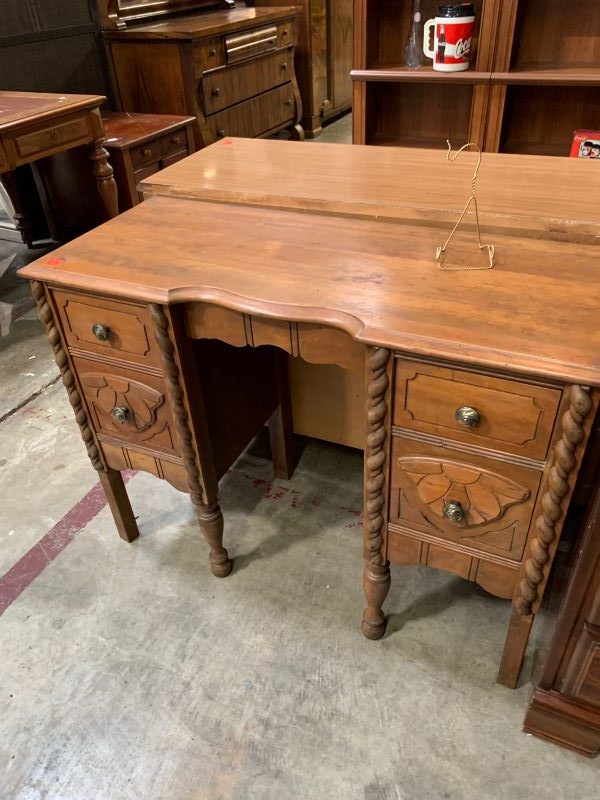
To begin, these painted pink end tables started off as a vanity! I have done similar furniture transformations like this with different vanity styles. One was a waterfall-style vanity. The process was nearly the same as the one I used for these pink end tables! You can reference my blog post for the steps to deconstruct a vanity to nightstands. I will also outline it briefly below!
Painted Pink End Tables Steps:
- Initial cleaning
- Deconstruct vanity to two end tables
- Prep cut sides for repair and fill
- Sand fill and prep sand end tables
- Remove sanding dust and clean with simple green
- Route cut tabletop edges
- Remove sanding dust
- Paint end tables
- Distress & seal
- Add details like drawer liner and hardware!
Step 1: Initial cleaning
Like all my furniture refinishing projects, I started with the most important step: prep work! For me, I like to start with a good scrubbing with simple green or krud kutter and a rag. This ensures I get all the built-up grime off the piece.
I like to clean first so the dirt and grime doesn’t get pushed into my piece when I prep sand later. Questions on how to prep your piece for paint? Check out my full process on how to prep your furniture for paint!
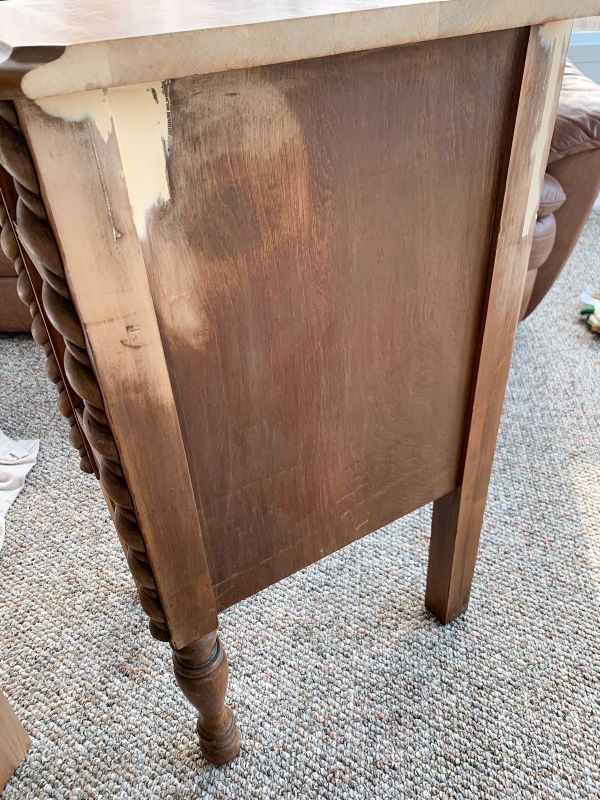
Step 2: Vanity deconstruction
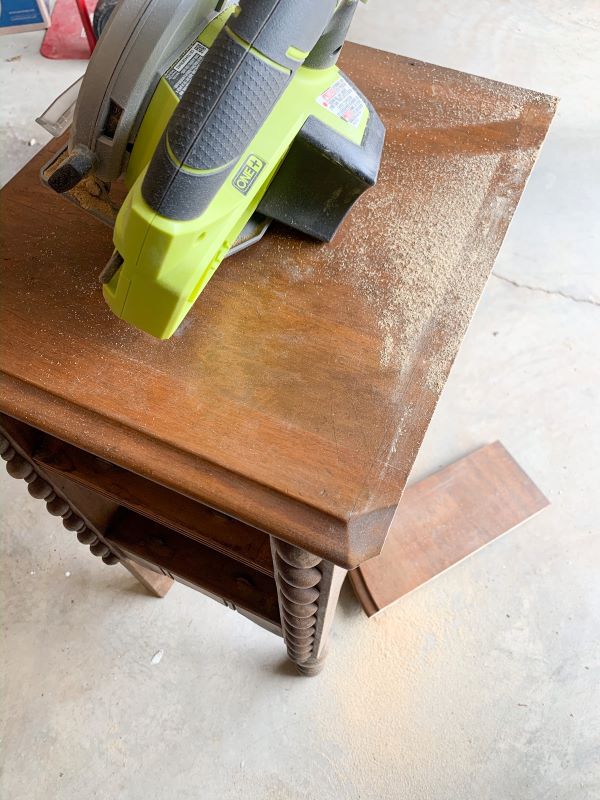
Next, deconstruction. To do this I used my circular saw first to cut the vanity in half. I cut as far as I could down the middle. Then, I used my jigsaw to cut the remaining edges.

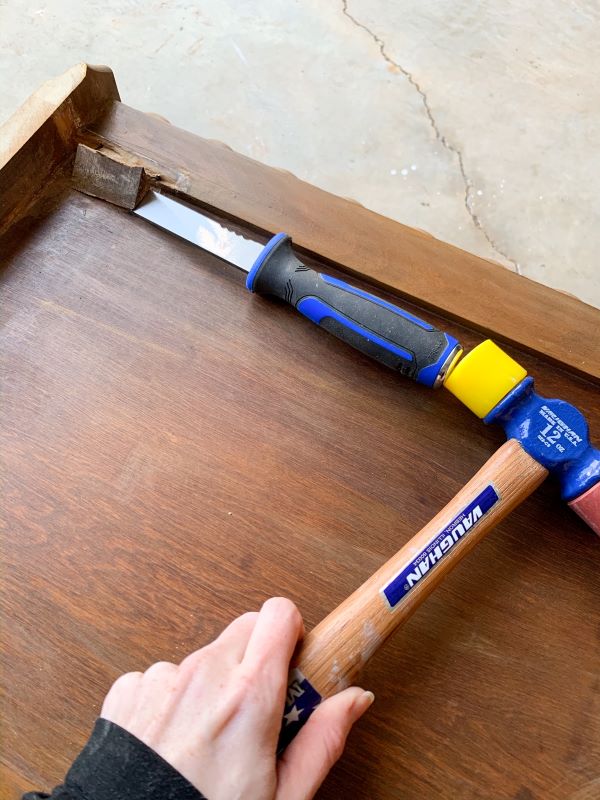
Once in two pieces, I used my hammer to remove nails holding the backplate. Next, I used my rubber mallet to loosen and remove the front and backplate no longer needed.
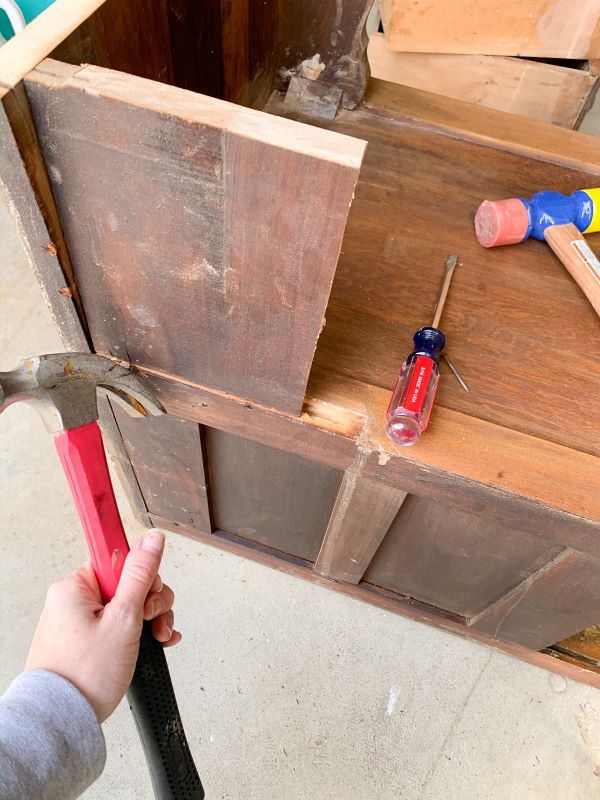
After this, I made my specific measurements of where I needed to cut the top edges down. I used my circular saw to make these cuts.
Lastly, I used a chisel and my mallet to remove the extra wood pieces still attached at the sides.
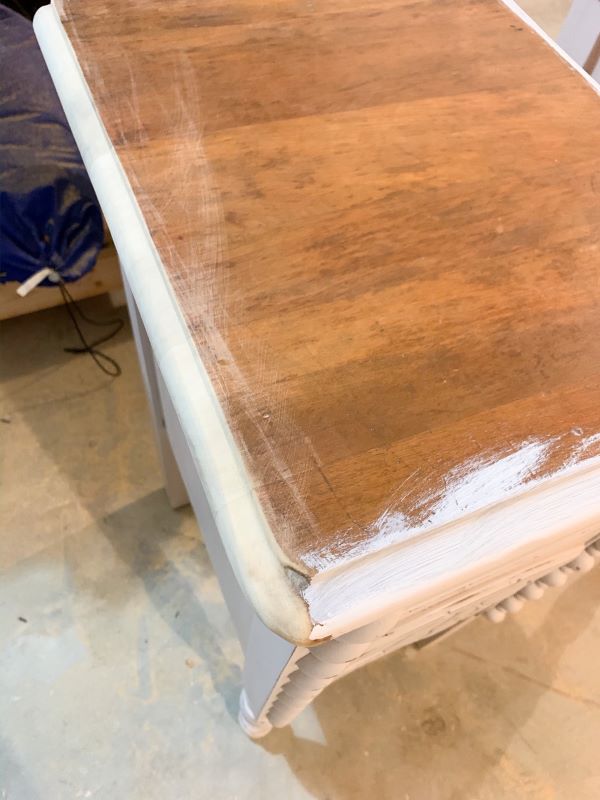
Step 3: Prep cut sides for repair and fill
Once this step is done and you have your two end tables cut down, it’s time to assess the damage and make your repairs!
Fill prep:
To do your fill, you will want to have a prepared surface. What does this mean? It includes prep sanding your fill areas with medium to fine-grit sandpaper so you don’t have jagged or rough spots. It also includes cleaning the surface so your filler adheres properly. You can reference how to use bondo for furniture repairs for this step!
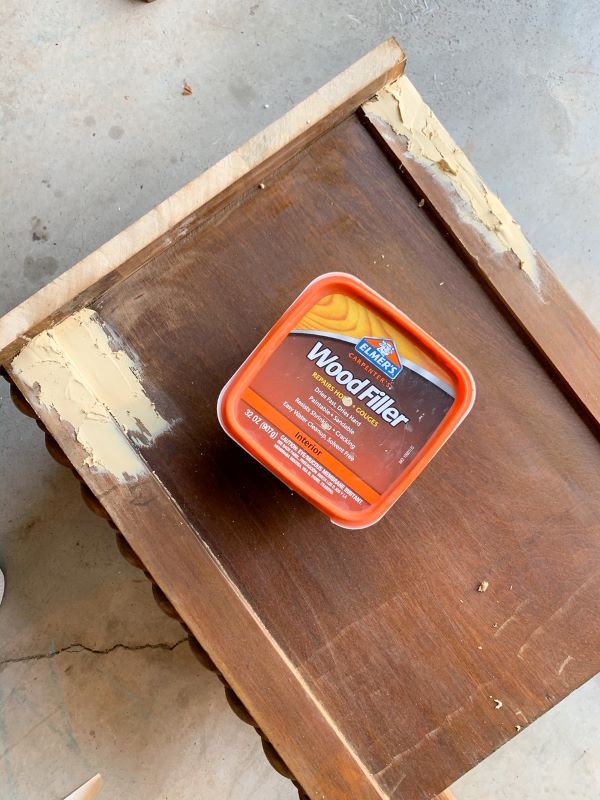
Apply filler:
For this step, I used extra wood filler I had and ended up doing 2 applications to get the fill coverage I needed.
Step 4: Sand fill and prep sand end tables
After sanding down the fill to a smooth finish, I continued my prep sanding using 220-grit sandpaper with my orbital sander. Then, I used a sanding block and my zip sander for the detailed corners that are tough to reach.
My guide on preparing your furniture for paint goes into detail on different levels of prep-sanding you can reference!
Step 5: Remove sanding dust
Once your end tables are prep sanded, remove the excess sanding dust with a tack cloth. Then, use a cleaner like simple green to scrub it down.
Step 6: Route cut tabletop edges
The next step was the new process for me – using a wood router! Wood routers are great for a number of functions like creating joints and for this process, adding a detailed or decorative edge to wood furniture.
This tool was a little intimidating to me because, well – it’s a powerful power tool! I know that sounds obvious, but the bit moves extremely fast at 25,000 RPM. I’ll admit that with each tool I learn, there is a learning curve too!
Routing practice:
To make sure I was ready before jumping into my piece, I had mike help me set up the router. We got my bit all lined up to the depth I needed and practiced. I took the extra boards from cutting down the vanity top and used these as my practice boards. We clamped them down to our workbench. Then, put on our glasses and ear protection (routers are loud!) before making a few practice passes on the test boards.
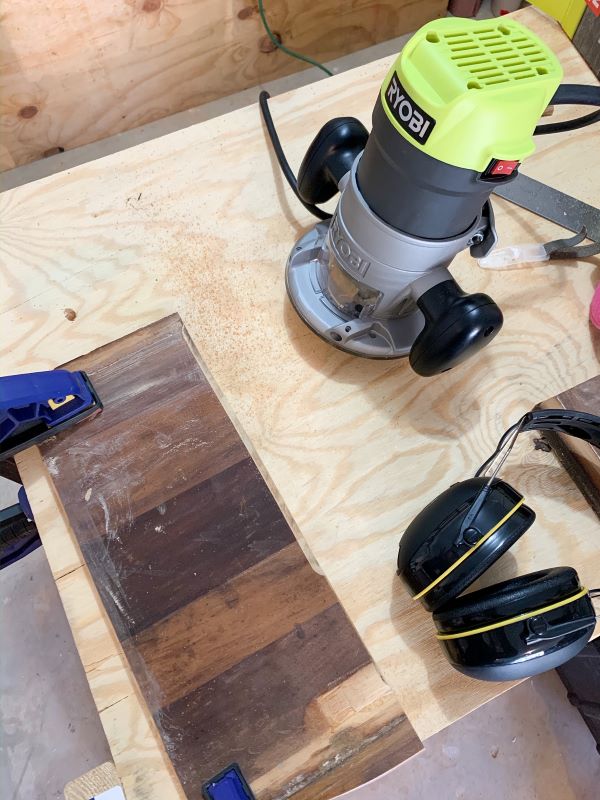
With each pass, I felt the router move smoother and created a straighter edge. Even though I was still nervous to take it to my end tables tops, I made the jump!
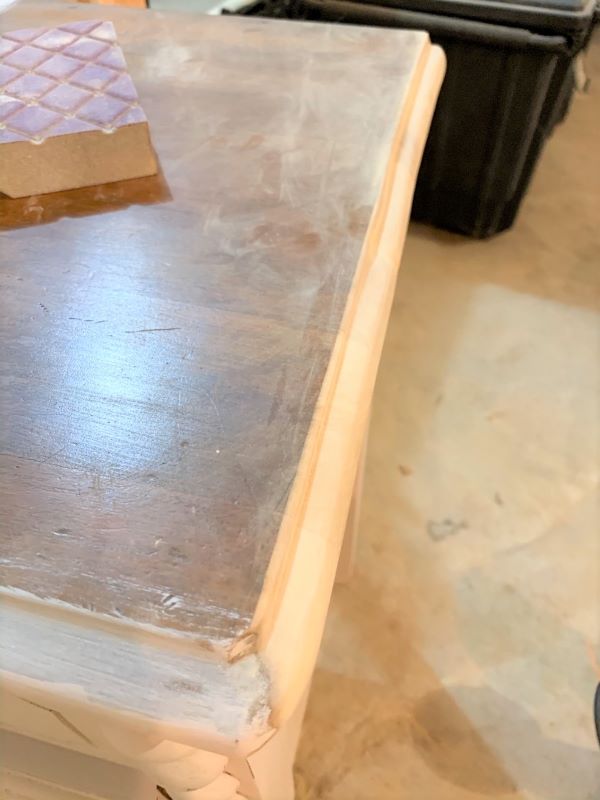
My first true routing attempt:
I won’t lie, they didn’t turn out perfect by any means. To help compensate for this, I went over the edges with a sanding block to try to even them out. Although they aren’t as precise as I wanted, I am still happy with them!
First-timer syndrome confession:
Sometimes (ok.. often for me) I expect to be nearly perfect my first time trying something, and I can get a little down when things don’t turn out as I pictured. Hellooo, that just isn’t always feasible, right?
Accept the perfectly-imperfect:
I have made many mistakes throughout my time refinishing furniture, but that is also how I have learned and gotten so much better! So, I am holding my head up even though the tops aren’t perfect. They were a learning experience, and will be a fantastic addition to our spare bedroom regardless!
I am excited to keep using my router for more projects until I am a pro! Once I am, I will be sure to share my process and all the tips & tricks I learn!
Step 7: Remove sanding dust with a tack cloth
For now, let’s move into the fun part – painting! With the extra sanding dust from routing the edges removed with a tack cloth, you are ready to paint.
Step 8: Paint your end tables!
As I mentioned, I chose the gorgeous color Amelia by The Chippy Barn for these painted pink end tables. It took about 2.5 coats without any primer. Like all The Chippy Barn colors I’ve used, this color went on sooo smooth & creamy and dried to a beautiful finish.
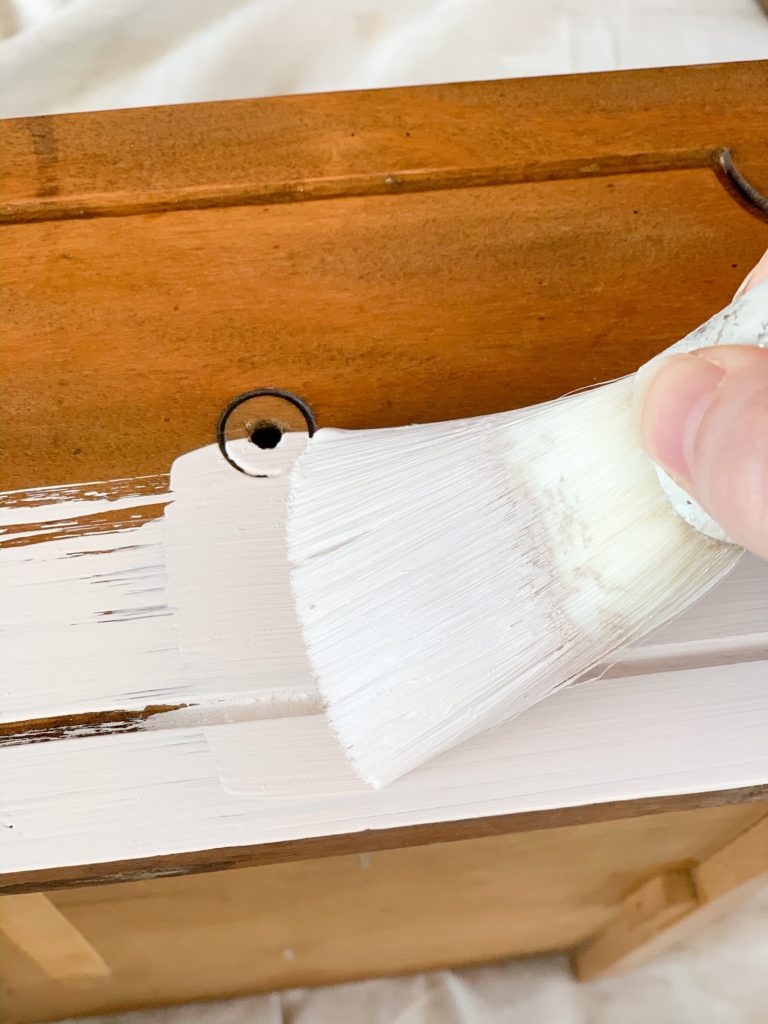
I used one of my absolute favorite Zibra painting brushes – my fan brush for this project! It gives such a smooth finish, especially across flat surfaces like the sides and top. It also contoured amazing for the detailed sections and legs too!
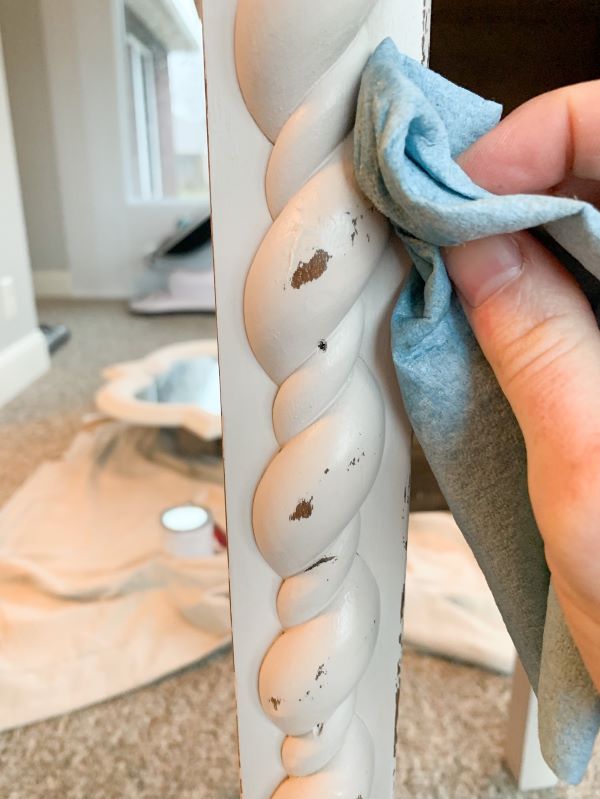
Step 9: Distress and seal painted pink end tables
With the fun curves and wood detailing on these nightstands, I decided to distress the edges with 220-grit sandpaper. I loved the pop of natural wood that came through.

After removing the sanding dust with a tack cloth, it is time to seal your end tables. I used The Chippy Barn’s lavender-scented clear wax! I say this every time I use this stuff, but dang, it smells so good! Using a lint-free rag, buff away the excess wax to a beautiful sheen.
Step 10: Add final design details
Drawer liner:
For extra feminine flair, I added pastel floral paper liner from Zazzle to the drawers! The pattern was soft, sweet, and embraced the Spring vibe of the end tables wonderfully!
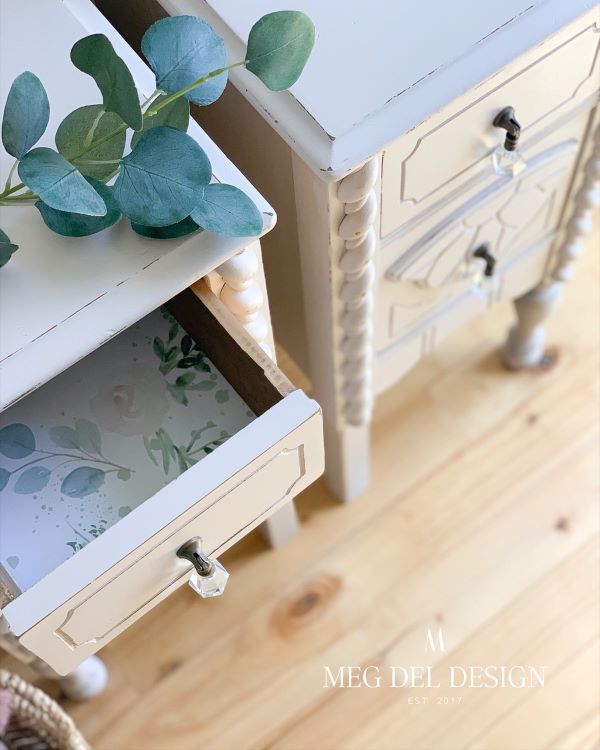
Hardware:
I topped the drawers off with glass drop pulls from Hobby Lobby. They match the ones I used on the transfer dresser, tying the pieces and room together!
Staging items:
I had to use my faux-peonies again for this piece because they showed off the painted pink color perfectly! I used a mix of light pink and white with a little eucalyptus to make my own bouquet.
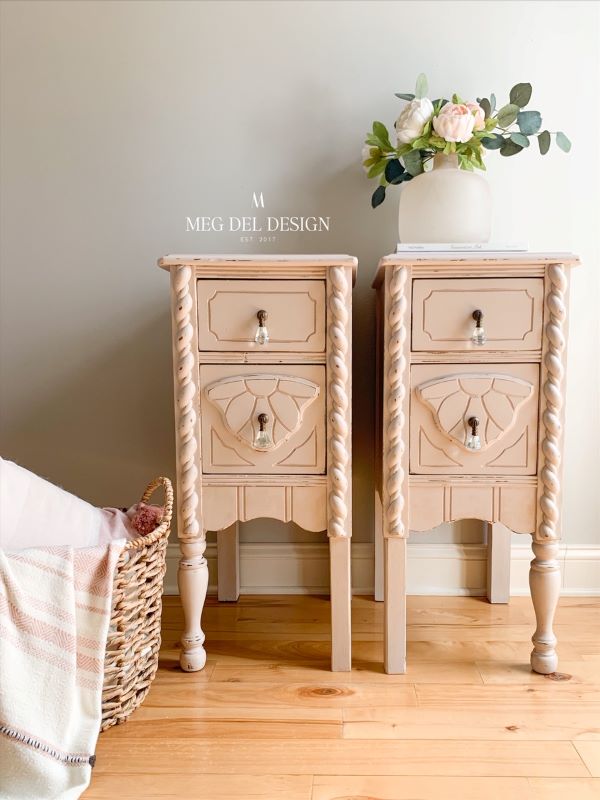
Lastly, I used decor items from our spare including this wicker basket, pillow, throw, and a favorite new book!
Painted pink end tables recap:
These cuties turned out so great for our spare bedroom! They are delicate, feminine, and elegantly-rustic. Thinking about our family being able to enjoy them while they meet their newest family member makes me so happy! Such an exciting time!
My goal is to share a full reveal of our spare bedroom once it’s nearly done. That is if my nesting continues strong before baby DeLong arrives!
I want to hear from you!
Have you tried to turn a vanity into end tables?! Is there anything holding you back I can help with? Let me know in the comments! If you try this project, I would LOVE to see how it turns out. Tag me on Instagram @megdeldesign!
Thanks & happy refinishing!
Meg
Looking for more furniture tutorials?
If you want to learn more step-by-step processes to up your furniture game, then add these favorites to your list:
-How to do a furniture transfer!
-Learn how to prep your furniture for paint!
-Repair furniture using bondo filler
Want more furniture inspiration and refinishing tips? Subscribe to my newsletter and follow along on Facebook, Pinterest, and Instagram for the latest updates!
How to Paint a Mirror
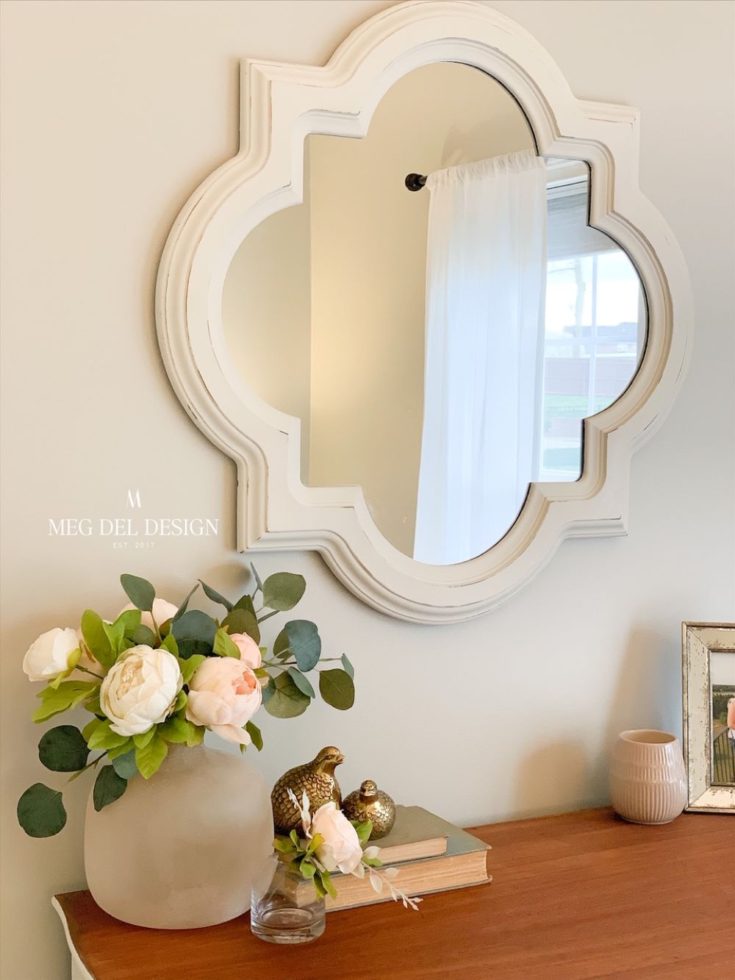
Follow these steps to easily paint a mirror!
Materials
Initial Cleaning
Prep Sanding
Final Prep Cleaning
Paint and Topcoat
Paint Removal
Instructions
- Initial cleaning: Clean your mirror using a general cleaner like simple green with a rag.
- Scuff sand: Using 220-grit sandpaper, gently scuff sand the existing mirror frame to create tooth for your paint to adhere to.
- Remove sanding dust: Use a tack cloth to remove the sanding dust from your mirror before paint.
- Paint mirror: Using your Zibra square brush, begin painting your first coat of paint on the mirror frame. Allow paint to dry and paint a second and third coat as needed.
- Remove excess paint on your mirror: Spray a little glass cleaner onto the mirror and use the razor scraper to move it toward the frame edge. Position your razor blade so the corner is angled under the frame. Begin applying pressure at about 45 degrees and run your blade along the edge of the mirror frame. Use a lint-free cloth with glass cleaner on it to remove the excess paint chips and to clean the mirror completely.
- Distress & seal: Using a 220-grit sanding block, distress the edges until the wood grain comes through. Remove the sanding dust with a tack cloth.
- Seal your mirror: Next, apply The Chippy Barn lavender-scented wax using a lint-free rag. Buff away the excess for a beautiful sheen.